Jack-O’-Lantern Ideas
21 Jack-O’-Lantern Ideas That Go Beyond the Basic Face
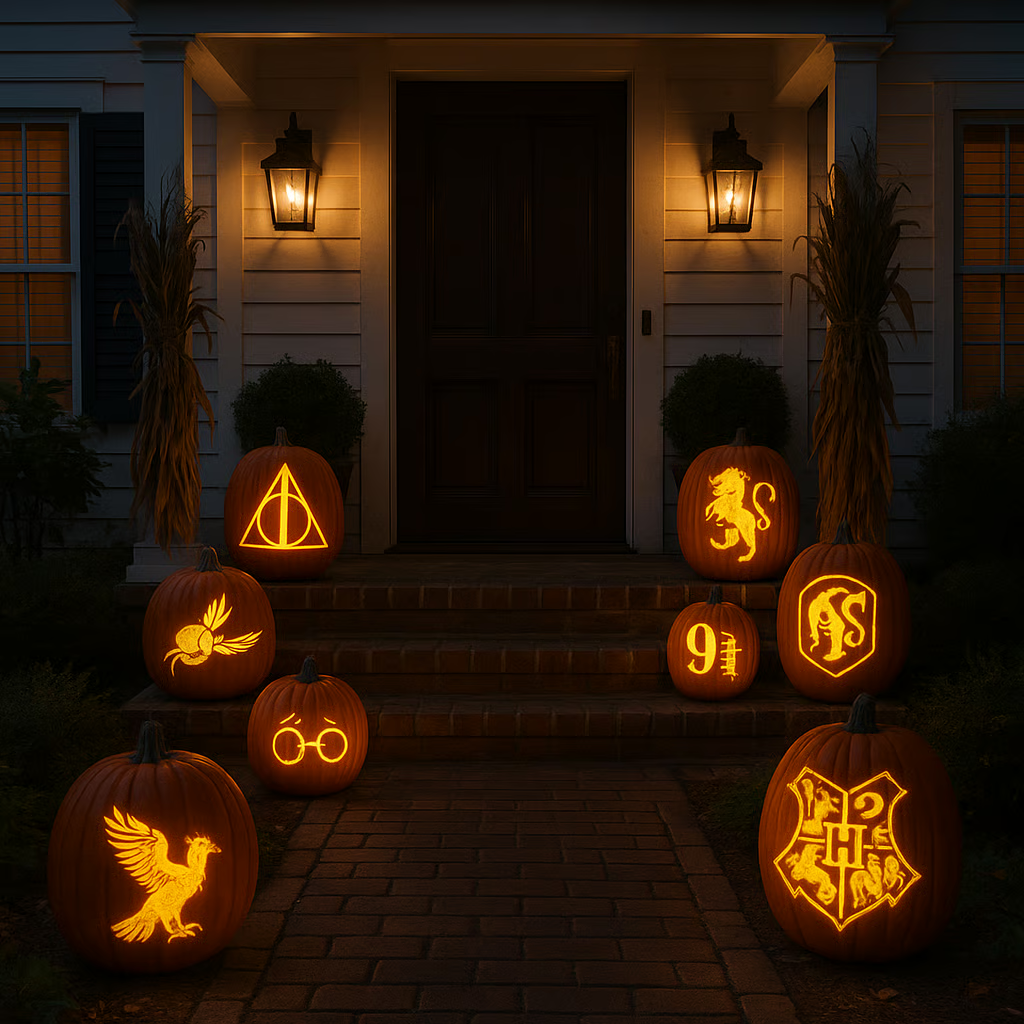
Halloween carving goes far beyond simple triangle eyes and jagged smiles. This season invites you to explore themed designs, creative displays, and bold arrangements that transform pumpkins into glowing works of art. These 21 jack-o’-lantern ideas give you fresh ways to carve, arrange, and showcase pumpkins that stand out on any porch or at any gathering.
From whimsical storybook scenes to eerie glowing creations, each idea highlights how carving can become both fun and artistic. Expect inspiration that ranges from single-pumpkin faces to elaborate multi-pumpkin displays designed to impress. The first idea sets the stage for how a pumpkin can become more than decoration—it can become the centerpiece of your Halloween night.
Pop Culture & Fantasy
Carving pumpkins with pop culture themes adds personality to your fall patio decor. A pumpkin shaped like a favorite movie character or game icon creates a playful mood while still blending with traditional autumn styling. These designs work well as focal points in pumpkin arrangements on front porch steps.
Consider mixing fantasy creatures like dragons, wizards, or fairies with modern icons from TV or film. This balance keeps your outdoor Halloween pumpkin display fun while still fitting into a cozy seasonal setup. Pairing carved designs with uncarved pumpkins in varied sizes adds texture and depth.
For a simple setup, try grouping three pumpkins:
- Top step: a carved hero or villain from a popular film
- Middle step: a painted pumpkin with glitter or metallic accents
- Bottom step: a large uncarved pumpkin to ground the display
Adding lanterns, hay bales, or plaid blankets nearby ties the look into your fall front porch styling. The mix of carved art and natural pumpkins creates a layered effect that feels inviting.
When planning creative fall porch ideas, think about how your carved designs interact with the rest of the space. A glowing fantasy pumpkin surrounded by mums or corn stalks makes the entire porch feel more seasonal. This approach highlights the pumpkin as both artwork and decor anchor.
Pumpkins of Hogwarts
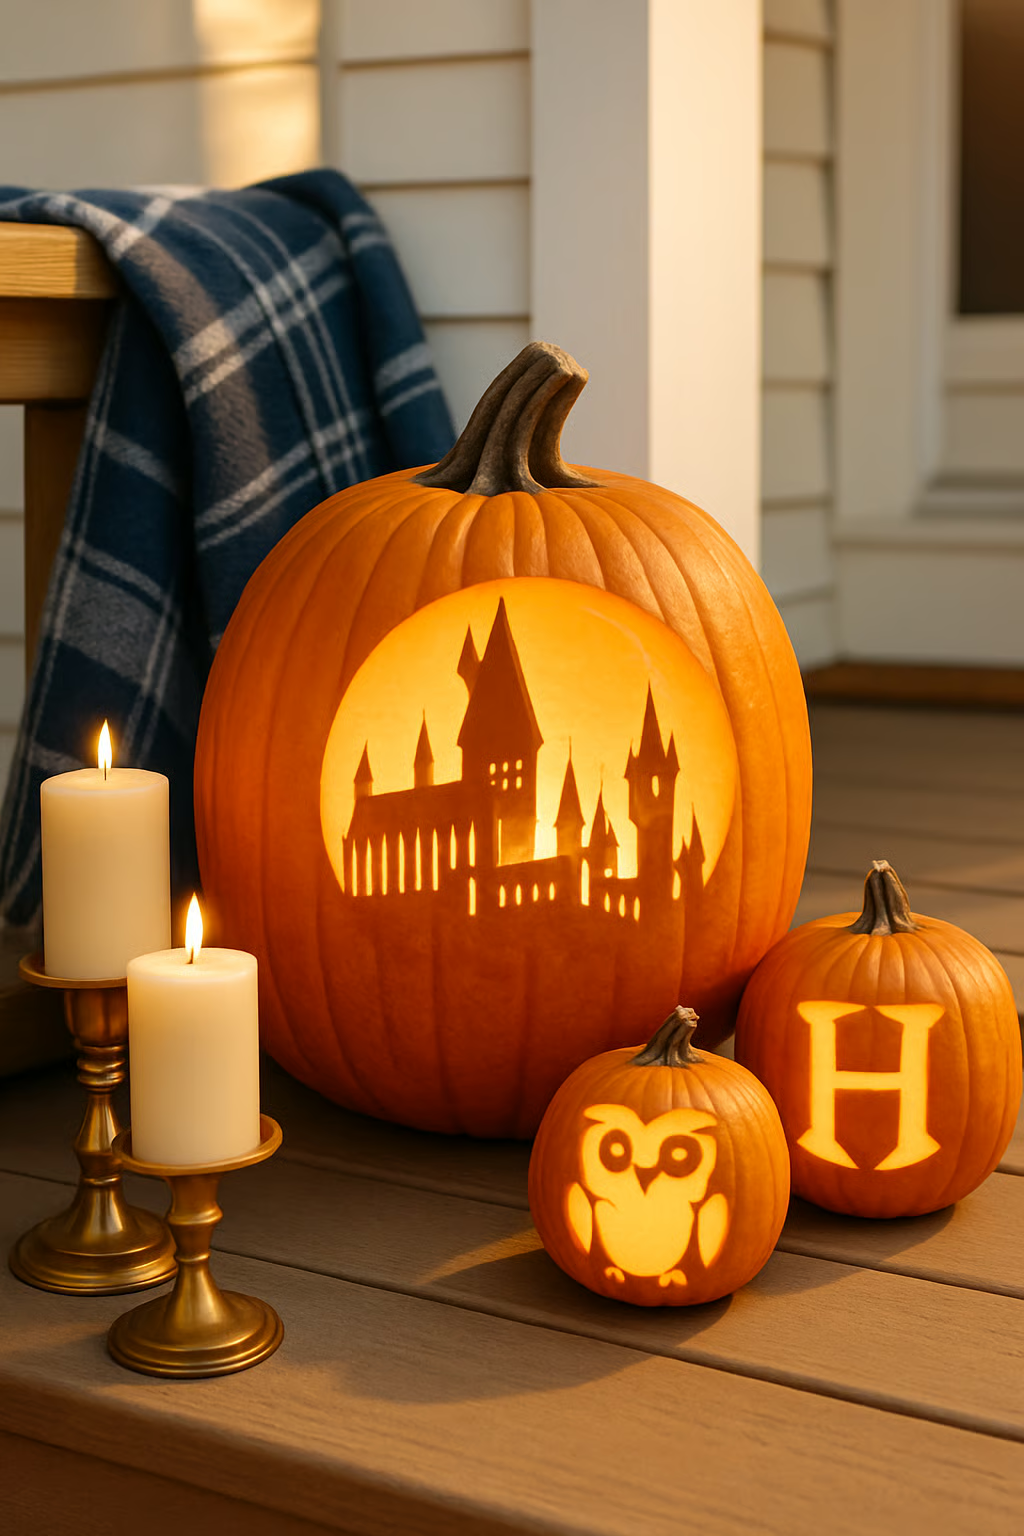
Create a Hogwarts castle silhouette on a large pumpkin to set the scene. Use layered carving to suggest the look of stone walls and glowing windows. This style works well as a centerpiece for themed parties or movie nights.
Place smaller pumpkins nearby carved with house crests or an owl design inspired by Hedwig. These add variety and connect the display to familiar symbols from the wizarding world. Mixing different sizes and patterns makes the setup feel complete.
Stencils or chalk-transfer methods help achieve clean lines and balanced shapes. These tools make even detailed designs fit into easy pumpkin ideas without requiring advanced skills.
This approach blends creative pumpkin carving with recognizable themes. It gives you unique jack o lantern ideas that stand out while staying practical for Halloween pumpkin carving. The result fits both casual decorating and more amazing pumpkin carving projects.
Wizard of Gourd
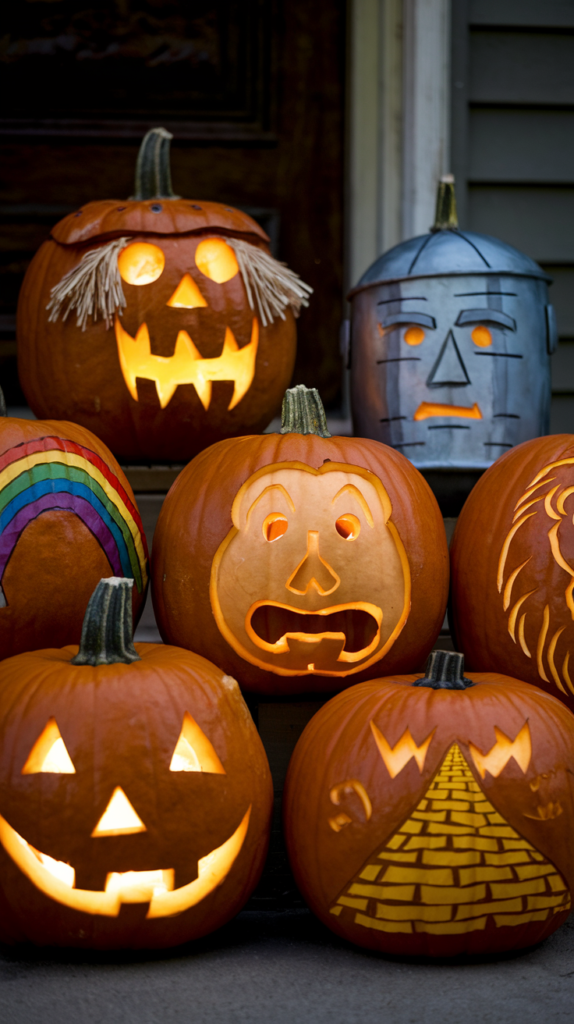
Create a themed lineup that draws from the classic story while keeping the designs simple enough to carve. A witch silhouette with a pointed hat makes a strong centerpiece, while smaller gourds or pumpkins can hold the faces of the scarecrow, tin man, and lion. Keep the expressions friendly and clear so they read well from a distance.
Add flying monkeys as smaller accent carvings to tie the group together. Using different sizes of gourds or pumpkins helps create variety and makes the display feel more complete. This approach works well for group pumpkin carving ideas since each person can focus on a different character.
Lay down a narrow runner with straw along the base to suggest a yellow brick road. The detail is subtle but gives instant recognition and adds depth to the setup. It also helps frame the carved pumpkin ideas in a way that feels organized and intentional.
These designs count among the best jack o lantern ideas because they combine multiple characters into one cohesive theme. The result is a creative display that balances fun with readability, making it easy to enjoy whether viewed up close or from several feet away.
Neverland Nights
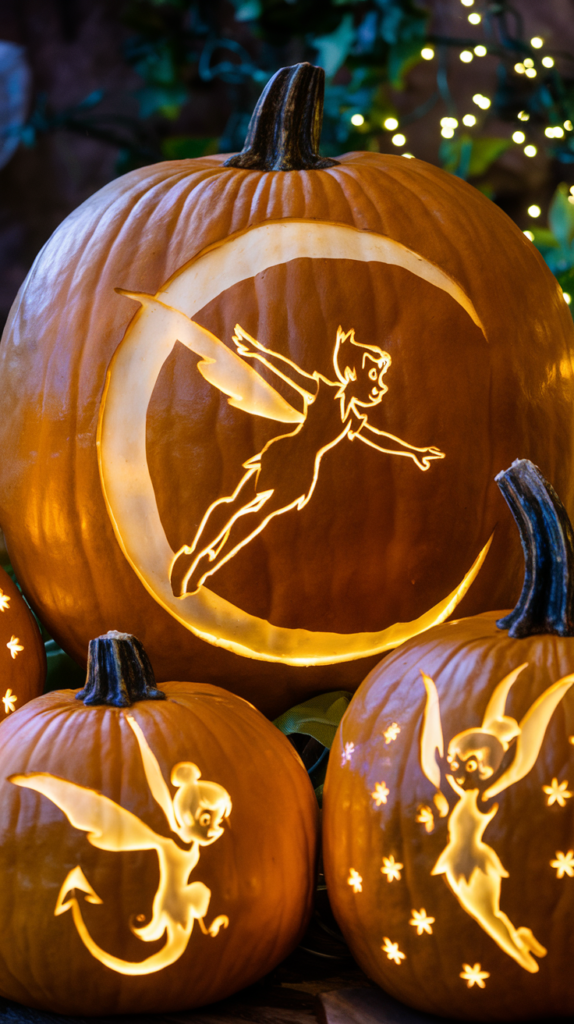
Bring a little magic to your Halloween pumpkin carving with a Neverland theme. This idea blends creative pumpkin carving with simple shapes that tell a story. It works well if you want unique jack o lantern ideas that stand out without being too complex.
Carve Peter’s flying silhouette across a round “moon” pumpkin. Add a small hook motif on a second pumpkin to give a nod to Captain Hook. Drill small holes in another pumpkin to create a sparkle effect, suggesting fairy dust around a Tinker-inspired design.
For the best jack o lantern ideas in this theme, think of it as a trio. Place the pumpkins together so the story unfolds side by side. Back the moon pumpkin with parchment to diffuse the light evenly and create a softer glow.
These cool pumpkin carving ideas are easy to adjust for different skill levels. Simple outlines work for beginners, while detailed cuts and drilled patterns suit more advanced carvers. The group display photographs beautifully and makes a strong impression for Pinterest or social sharing.
Seven Glowing Dwarfs
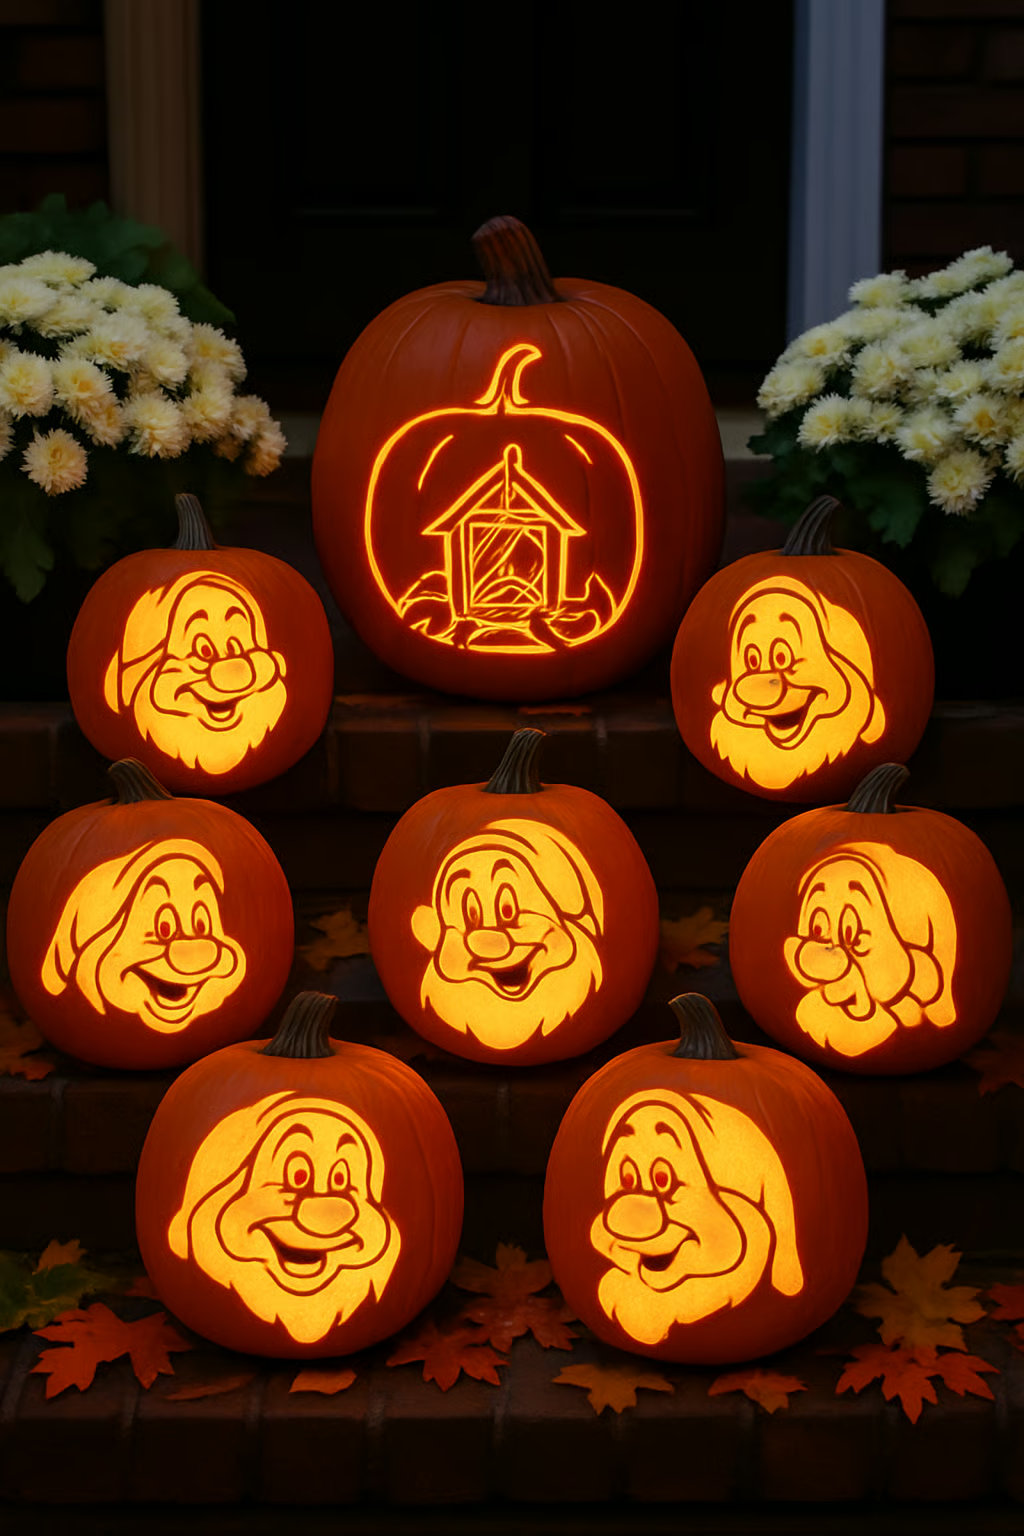
Create a playful scene by carving seven small pumpkins, each with a different expression. Give each dwarf a unique look using simple shapes for eyes, eyebrows, and mouths. Keep the lines bold so the faces stay clear when lit.
Anchor the group with a larger pumpkin carved in a gold mine-inspired silhouette. This centerpiece ties the smaller pumpkins together and makes the display feel complete. Place the big pumpkin behind or in the middle for balance.
Printable eye and eyebrow shapes make setup fast and family-friendly. Cut and trace them onto the pumpkins for a clean, cartoon-like style. This keeps the project in the category of easy jack o’ lantern ideas, even for beginners.
Think of this as both a group pumpkin carving idea and a creative pumpkin carving project. Each pumpkin adds personality while still working as part of the whole. The result is a cute pumpkin carving idea that looks fun and welcoming on a porch or windowsill.
This set also works well for parties or neighborhood displays. The glowing faces create a cheerful, themed design that stands out without being too complex.
Hero Pumpkins Unite
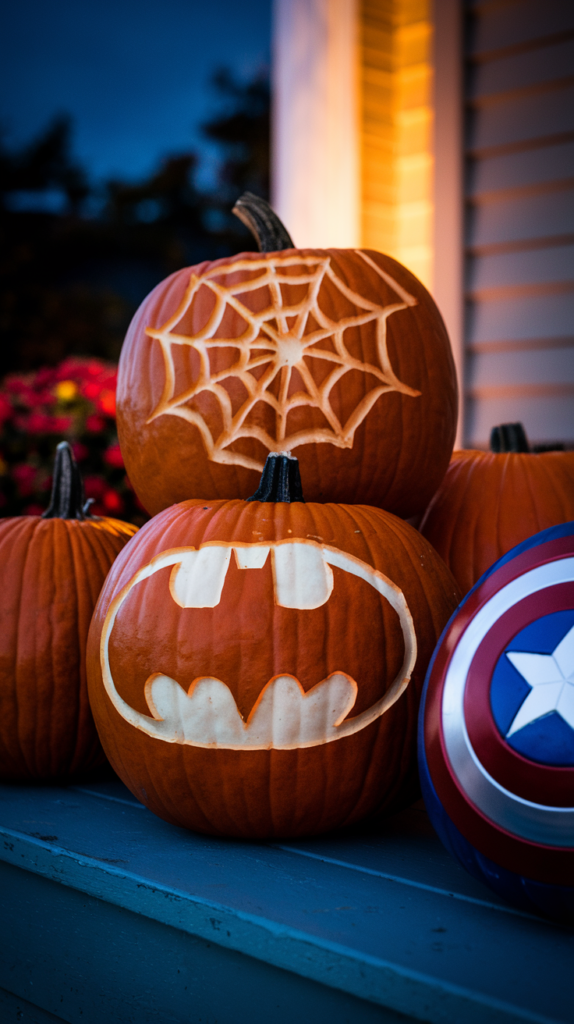
Bring superheroes into your Halloween display with bold designs that stand out. A bat silhouette, a web pattern, and a shield motif across three pumpkins create instant recognition. These symbols make some of the best jack o lantern ideas because they are simple, clear, and easy to identify even from a distance.
For the shield, use painter’s tape and a compass tool to keep the lines sharp and balanced. This method helps your carving stay neat and gives the design a clean, geometric look. It works well if you want unique pumpkin carving ideas that feel polished and precise.
Add glossy enamel paint on the non-carved areas to make details shine in daylight. The contrast between carved sections and painted surfaces brings depth and makes the pumpkins look more finished. This small step helps transform basic designs into amazing pumpkin carving projects.
Mixing these hero emblems with traditional jack o lantern ideas creative gives your porch a mix of classic and modern. The result is a display that feels fun, recognizable, and different from the usual spooky faces. These cool pumpkin carving ideas work well for fans of comics and for anyone looking for something fresh.
Alice in Pumpkinland
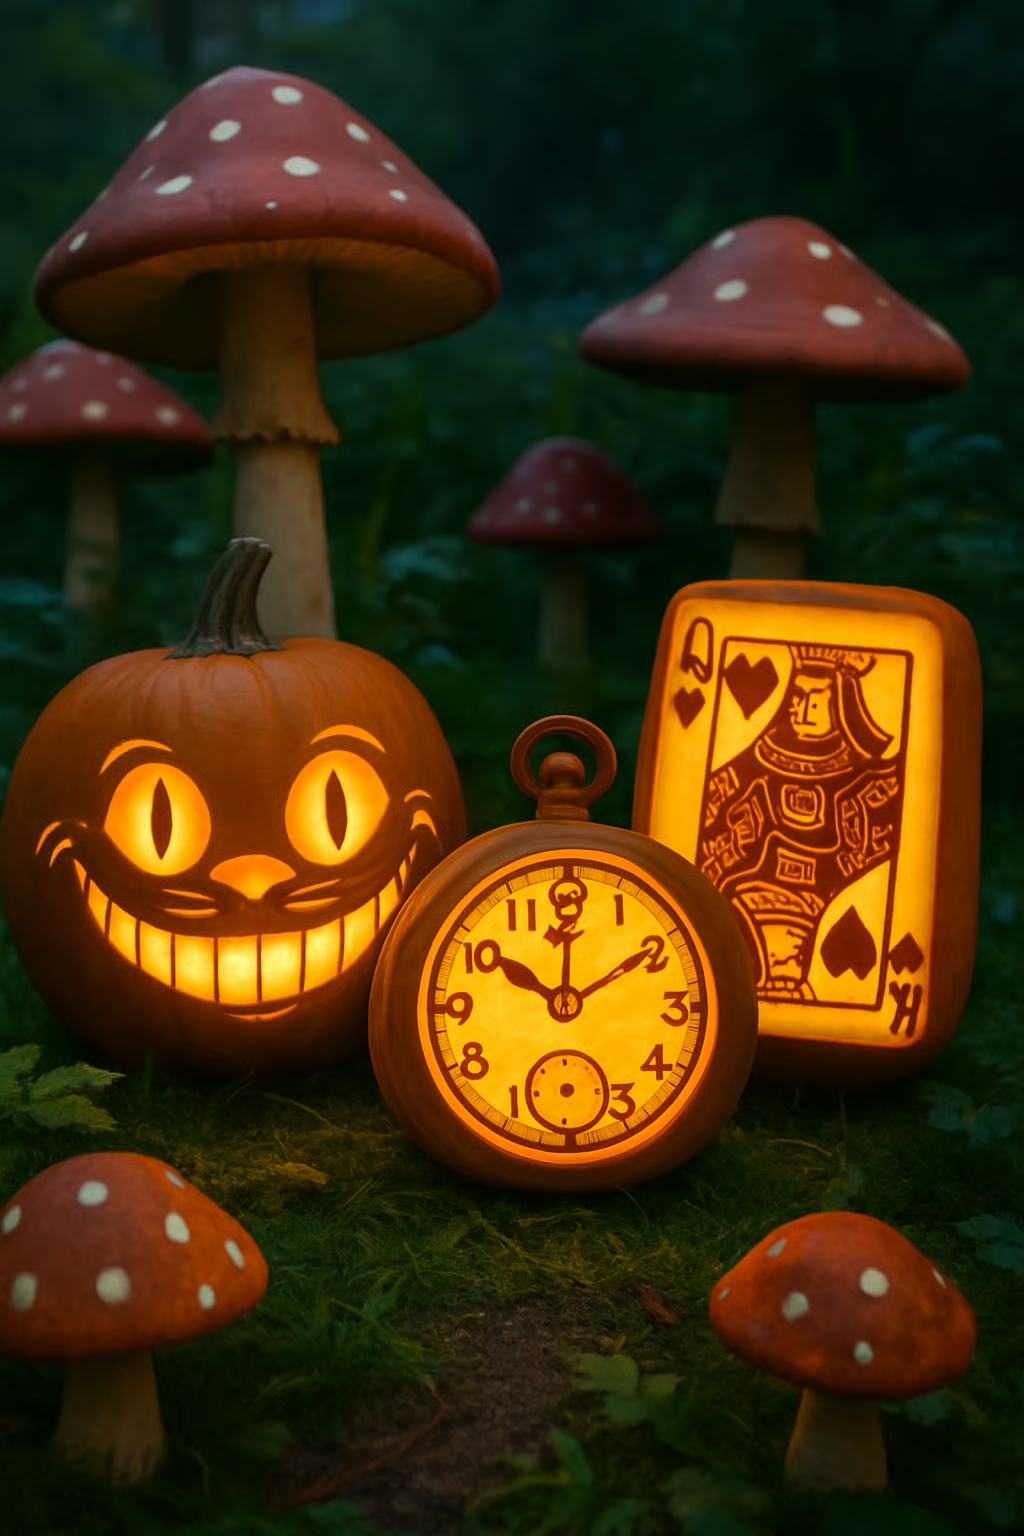
Bring Wonderland to your porch with carved pumpkin ideas inspired by classic characters. A Cheshire Cat grin works as a simple but unique jack o lantern idea, especially if you keep the wide smile and glowing eyes as the focus. It’s playful, easy to recognize, and fits well with family-friendly Halloween pumpkin carving ideas.
Add more creative pumpkin carving by shaping a pocket watch into the side of a pumpkin. Simple numbers and clock hands carved in relief make the design stand out without being too detailed. This style adds a subtle nod to the White Rabbit while keeping the design approachable.
For cute pumpkin carving ideas, carve the words “Drink Me” into a small pumpkin and place it next to larger designs. Lettering is straightforward, and the phrase makes the display feel like part of a story. Props like oversized mushrooms or teacups add color and make the setup more whimsical.
Mixing these carved pumpkin ideas creates a scene that feels playful rather than scary. The mix of grins, clocks, and words keeps the designs lighthearted, making them a good fit for younger kids and anyone who prefers cheerful over spooky.
Villains in the Glow
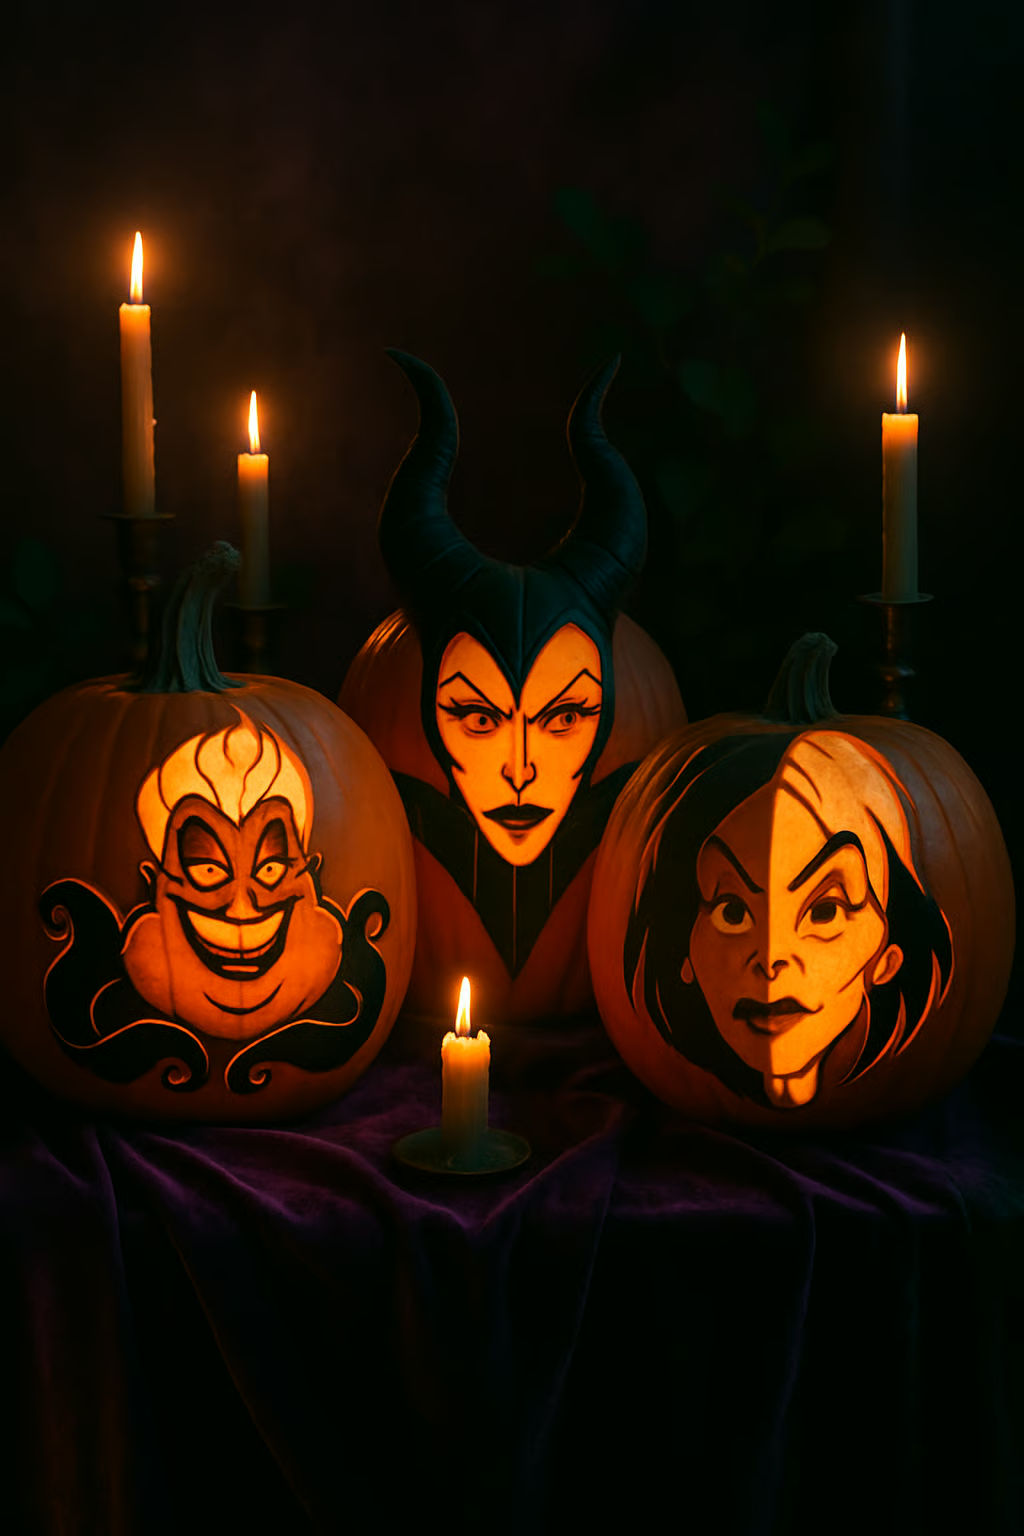
Bring a sinister flair to your Halloween display by carving famous villains into your pumpkins. Their sharp features and bold designs stand out in the flickering light, making them instant focal points on your porch or yard.
Create Ursula’s swirling tentacles wrapping around a pumpkin for a dramatic sea-inspired effect. The curves and lines give depth, while the glow adds an eerie underwater feel.
Shape Maleficent’s iconic horns into a strong silhouette. The tall, pointed design works well with a larger pumpkin, and the glowing cutouts highlight her dark, commanding presence.
Etch Cruella de Vil’s split black-and-white face for a stylish villain look. The contrast of her hair and sharp expression makes the design striking, especially when lit from within.
Arrange these pumpkins together for a themed trio. The mix of shapes, lines, and glowing details builds a display that feels both creative and recognizable.
Advanced Carving & Display Techniques
For a more striking effect, try layering cuts at different depths. Shallow scraping creates glowing shades of orange, while full cuts allow brighter light to shine through. This method works well for creepy pumpkin faces or ghost pumpkin carving ideas that need subtle detail.
Group several pumpkins together to form a scene. A haunted house pumpkin display with smaller gourds shaped like gravestones or eerie trees creates a stronger impact than a single carving. Adding height with crates or steps makes the setup more dramatic.
Experiment with negative space by carving silhouettes instead of detailed lines. Witch profiles, haunted pumpkin designs, or spooky jack o lanterns look bold when the background glows and the figure stays solid.
Consider lighting beyond candles. LED lights or flickering bulbs give scary Halloween pumpkins an eerie glow without the risk of fire. Mixing colors such as green or purple adds depth to horror pumpkin carving ideas.
| Technique | Effect | Best For |
|---|---|---|
| Layered carving | Creates glowing shades | Creepy faces, ghost designs |
| Grouped display | Builds a scene | Haunted house setups |
| Silhouette cuts | Bold contrast | Witch or tree outlines |
| Colored lighting | Adds atmosphere | Scary pumpkin carving ideas |
Adding these methods helps your pumpkins stand out as more than decorations. They become part of a larger Halloween display that feels planned and detailed.
Starry Gourd Galaxy
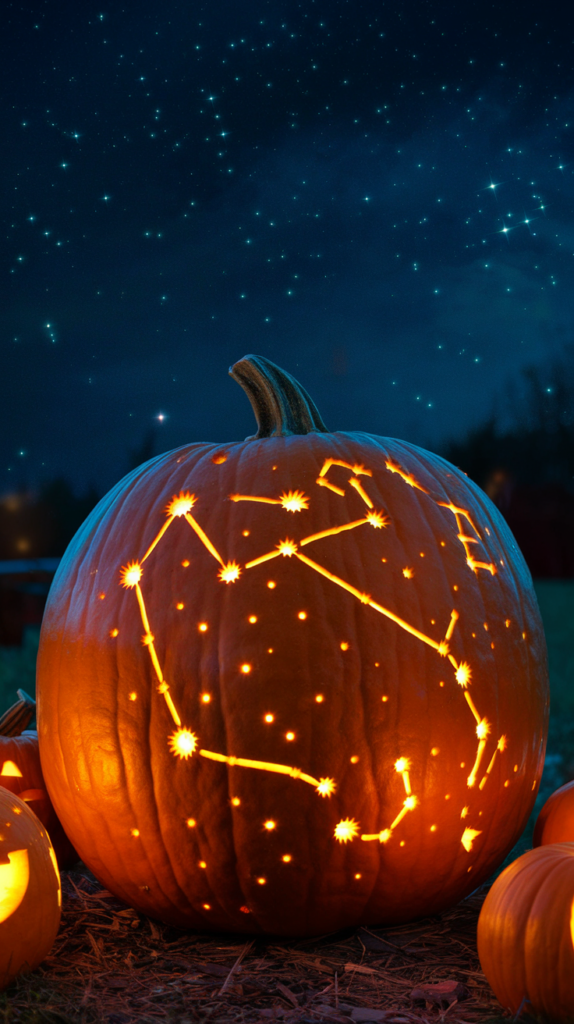
Turn a plain gourd into a glowing galaxy by drilling small holes in patterns that mimic real constellations. The Big Dipper, Orion, or zodiac signs work well and give your lantern a recognizable star map look. This approach adds a fresh option to your list of unique pumpkin carving ideas.
Etch a simple horizon line or crescent moon to frame the design and give it more depth. This small detail makes the piece stand out as one of the more creative pumpkin carving projects. It also works as a subtle background that highlights the constellation pattern.
Use two different drill bits to create stars of different sizes. This method adds variety and makes the design appear more natural, similar to how stars vary in brightness. A printable constellation template helps guide the layout and keeps the pattern accurate.
This style works well if you want cool pumpkin carving ideas that last beyond one season. Dried gourds resist mold, so your starry lantern can be displayed year after year. It offers a practical and artistic option among Halloween pumpkin carving ideas and gives your display a polished, lasting look.
The Pumpkin Dragon
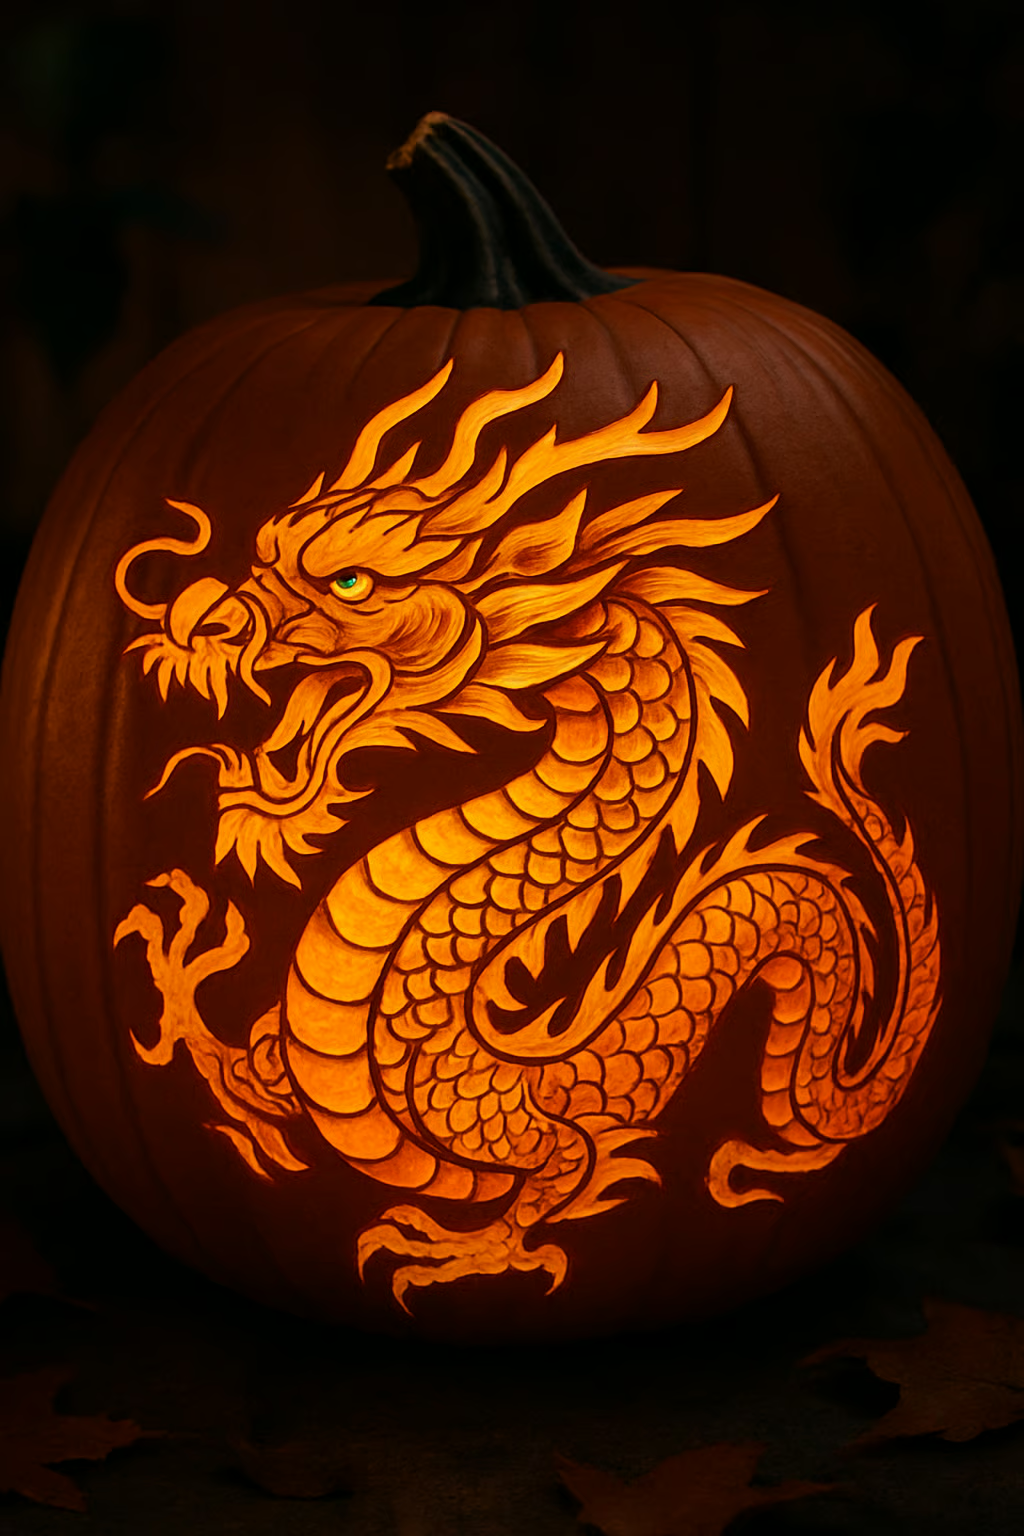
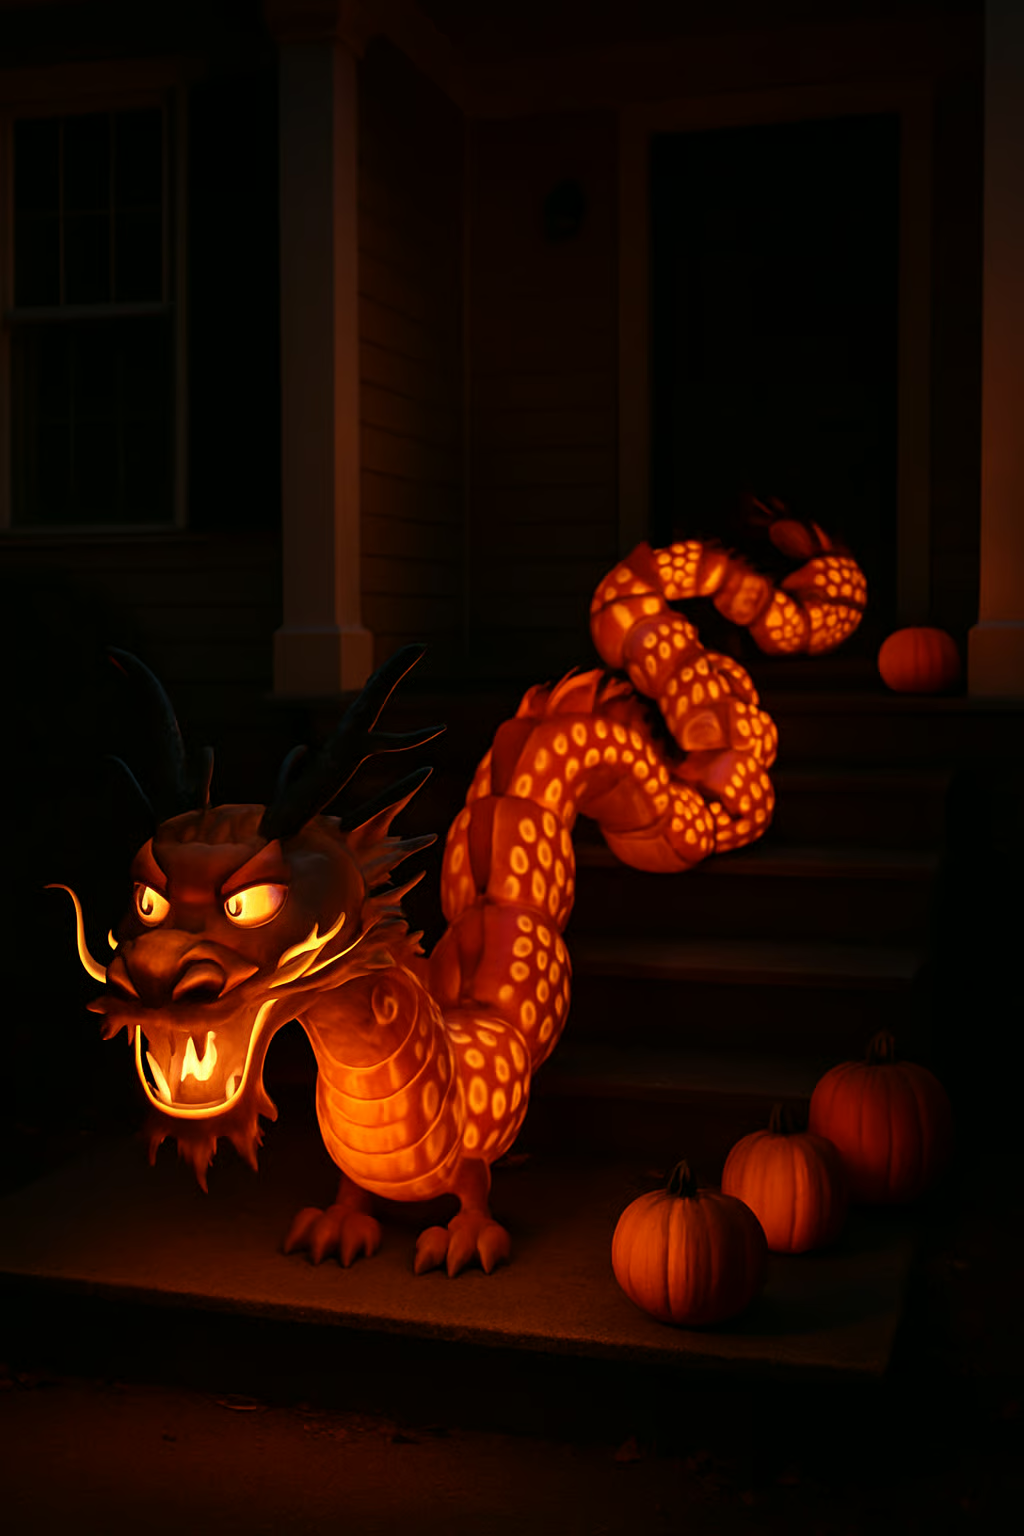
Build a dragon from pumpkins to create one of the most unique pumpkin carving ideas for Halloween. Stack a row of pumpkins in different sizes to form the body, starting with small ones for the tail and moving to larger ones for the head. This segmented style makes the project easier to manage than carving one large piece.
Carve each pumpkin with scales, flames, or simple shapes that glow when lit. These details give the dragon texture and make it look more alive at night. LED candles work well for safe lighting and keep the design glowing for hours.
Add horns, whiskers, or other features to the head with small gourds, corn husks, or similar materials. These details highlight the dragon shape and make it stand out among other carved pumpkin ideas.
This project combines amazing pumpkin carving with a creative approach that goes beyond a single jack-o-lantern. The linked pumpkins create movement, giving your porch or yard a Halloween display that feels both festive and original.
Chandelier of Flames
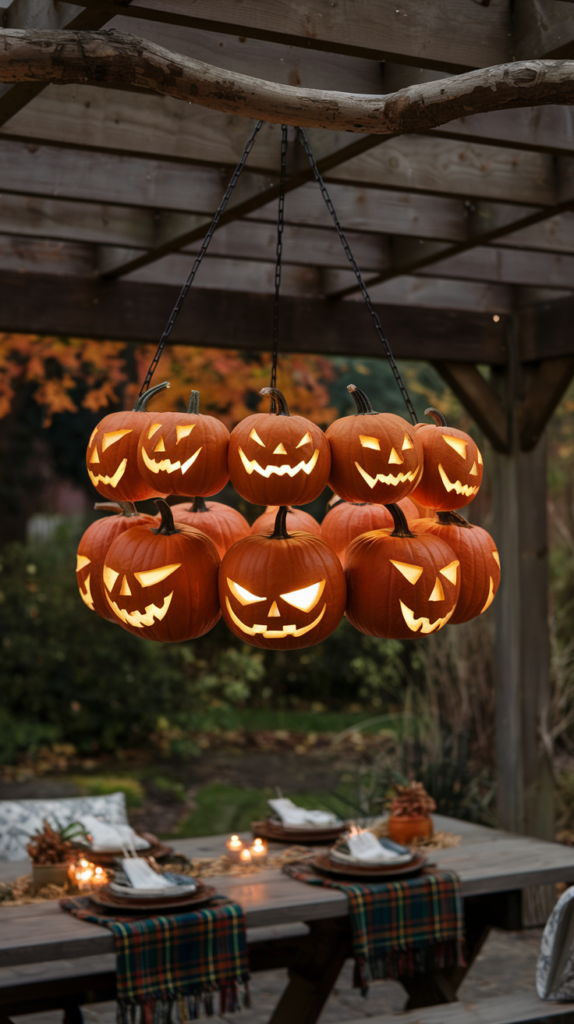
Elevate your Halloween display by creating a chandelier made of carved pumpkins. Hollow out small pumpkins, carve simple or detailed designs, and secure them with sturdy twine or metal chains. Hang them at different heights to add depth and visual interest.
For lighting, place LED candles or battery-powered tea lights inside each pumpkin. This creates a safe glow without the risks of open flames. The soft light adds an eerie but inviting atmosphere, especially in dimly lit rooms or outdoor spaces.
Experiment with patterns to match your theme. Classic faces, star shapes, or geometric cutouts all work well. Mixing designs gives the chandelier a unique look while keeping the overall display cohesive.
Position the chandelier above a dining table, porch, or entryway to make it the centerpiece of your decorations. The floating pumpkins combine seasonal charm with a dramatic focal point that guests will notice right away.
Totem of Shadows
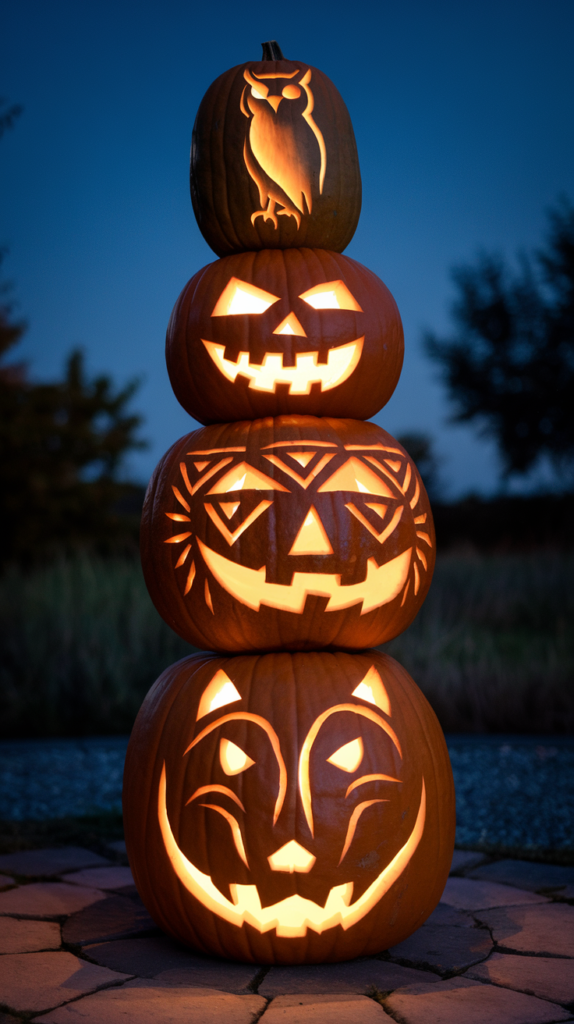
Stacking pumpkins into a vertical totem creates one of the most unique jack o lantern ideas for Halloween. This design works well when you want to display multiple carved pumpkin ideas in a small space while still keeping each face clear and distinct.
Drill a straight channel through each pumpkin and slide them onto a wood dowel for stability. This keeps the structure aligned and safe, especially if you plan to display it outdoors.
Carve connected motifs that build upward, such as an owl perched above a geometric band, followed by a wolf, and then a crescent moon. These stacked images give the totem a layered story while still remaining simple to read from a distance.
Leave clean negative-space bands between each carving so that the light separates the designs instead of blending them together. This method highlights the details and prevents the glow from merging into one large blur.
This approach works well for group pumpkin carving ideas too. Each person can take one pumpkin in the stack, allowing for a collaborative project that still results in a single cohesive display. It is a practical way to combine amazing pumpkin carving with one of the best jack o lantern ideas.
The Pumpkinarium
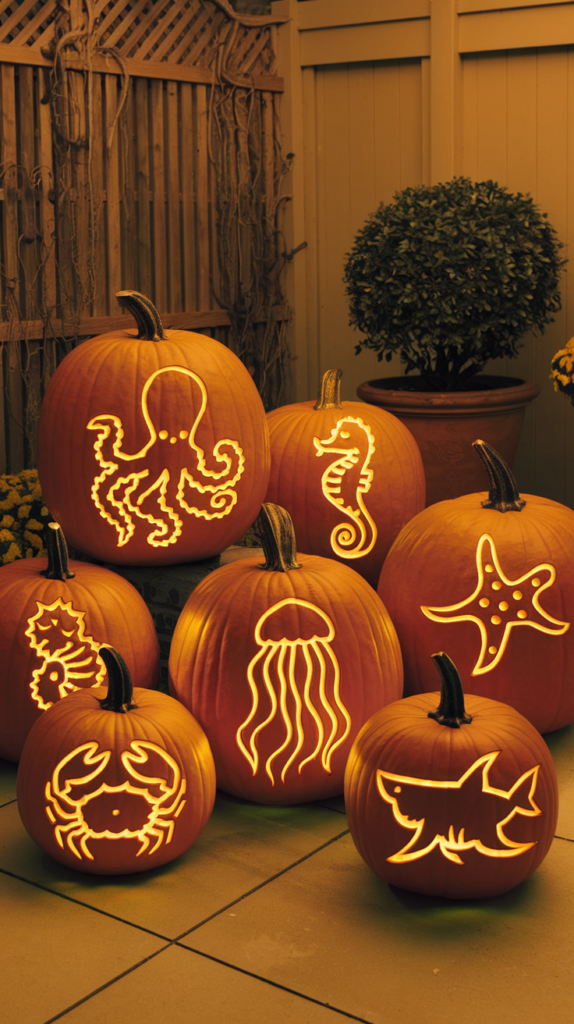
Create a pumpkin that feels like an underwater world. Carve flowing lines to suggest seaweed, add fish with patterned scales, and shape curling octopus arms for movement. Drill small round holes to look like bubbles rising to the surface.
Place blue parchment or thin paper inside to shift the candlelight into an aqua glow. This simple detail changes the mood and makes the design stand out among other carved pumpkin ideas.
Use layering techniques to carve at different depths. Shallow cuts let light pass softly, while deeper cuts create strong highlights. This approach works well for anyone looking for cool pumpkin carving ideas with more dimension.
The Pumpkinarium works as a centerpiece for a porch or table. It blends creative pumpkin carving with a theme that feels fresh and different from traditional faces. For those seeking amazing pumpkin carving projects, this design shows how a single idea can become a showpiece.
Whispering Woods
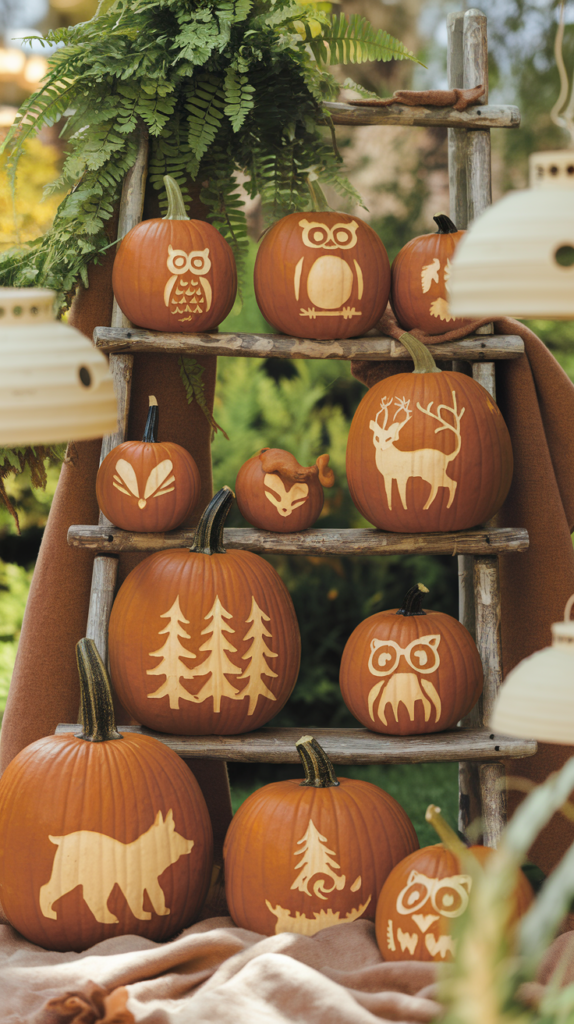
Create a row of pumpkins that tell a woodland story. Carve simple tree silhouettes across each one, letting the lines connect when placed side by side. This idea works well if you want creative pumpkin carving without making it too detailed or hard to follow.
Add small owls resting on branches and a fox curled at the base of a tree. These carved pumpkin ideas stay cute and friendly, making them perfect for kids as well as adults. The designs remain clear even when lit from inside.
Drill tiny holes to form glowing dots, giving the effect of fireflies or fairy lights. This adds a soft sparkle that makes the pumpkins feel magical without needing complex cuts. It also blends well with other unique jack o lantern ideas.
Mixing animals, trees, and glowing details turns your pumpkins into a miniature forest scene. This style offers a fresh take on Halloween pumpkin carving ideas while staying playful and light. The result feels like a gentle story unfolding in your own yard or porch.
Pumpkin Planetarium
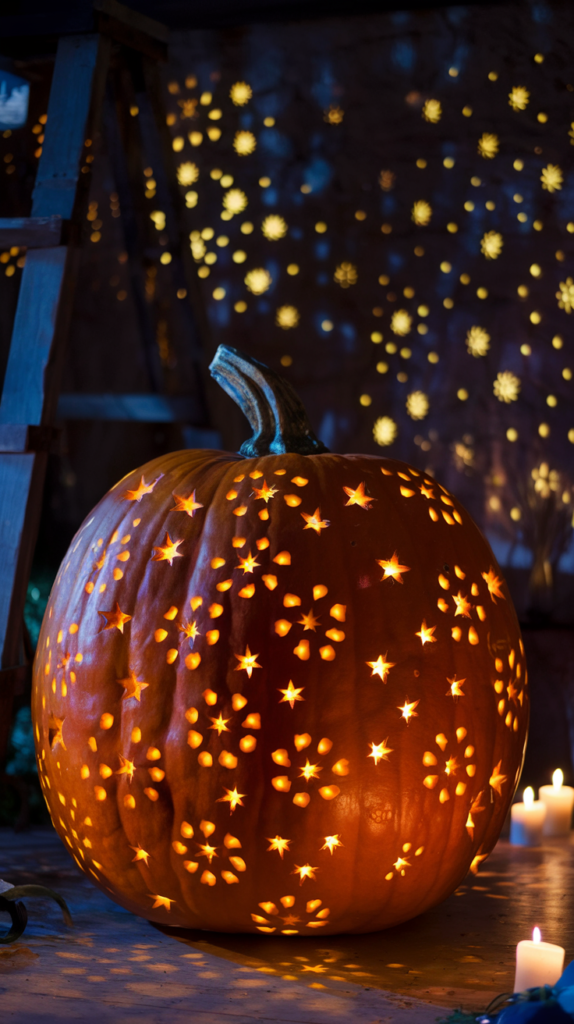
Turn a plain pumpkin into a glowing planetarium by drilling small holes across its surface. When lit from the inside, the light shines through and casts star-like patterns on nearby walls and ceilings. This idea works well as a unique pumpkin carving design that stands out from traditional faces.
Plan your layout by sketching simple pumpkin carving patterns or using a printed template. A dense cluster of holes on one side creates a Milky Way effect, while evenly spaced dots mimic a night sky. This approach gives you one of the coolest pumpkin carving ideas without requiring complex cuts.
A metal skewer or small drill bit helps create clean, round openings. Keep the holes similar in size for a neat finish, or vary them slightly to add depth. This simple method produces an amazing pumpkin carving that looks impressive with only a tea light or LED candle inside.
The Pumpkin Planetarium works indoors or outdoors as part of your Halloween pumpkin carving ideas. It provides a calm, glowing atmosphere and offers a creative alternative to spooky or funny designs. This project shows how easy it is to turn a single pumpkin into something striking and memorable.
Front Porch Displays & Group Arrangement
Placing jack-o’-lanterns on porch steps creates a simple and classic display. Arrange them in a line or staggered pattern to guide guests toward your door. Mixing carved and uncarved pumpkins adds variety without overwhelming the space.
Tiered towers work well when you want height and dimension. Stack pumpkins of different sizes, carving faces into the top layers while leaving the base solid for stability. This method saves space while still making a bold statement.
Family sets bring personality to your porch. Carve themed characters such as ghosts, skeletons, or monsters and arrange them together. Keeping designs consistent ties the group together and makes the display more memorable.
For a lighter style, try whimsical groupings. Use friendly smiles, silly shapes, or even painted accents to create a playful look. Pair these with mums or lanterns in autumn colors for a balanced arrangement.
A quick reference for display ideas:
| Arrangement Style | Key Features | Best Placement |
|---|---|---|
| Steps Display | Lined or staggered pumpkins | Porch stairs, entryway |
| Tiered Tower | Stacked pumpkins with carved tops | Corners, against railing |
| Family Set | Themed characters (ghosts, monsters) | Center of porch |
| Whimsical Grouping | Cute faces, painted details, mums | Near seating or door |
Mixing these approaches gives your porch a layered and welcoming seasonal look.
Gourdshire Village
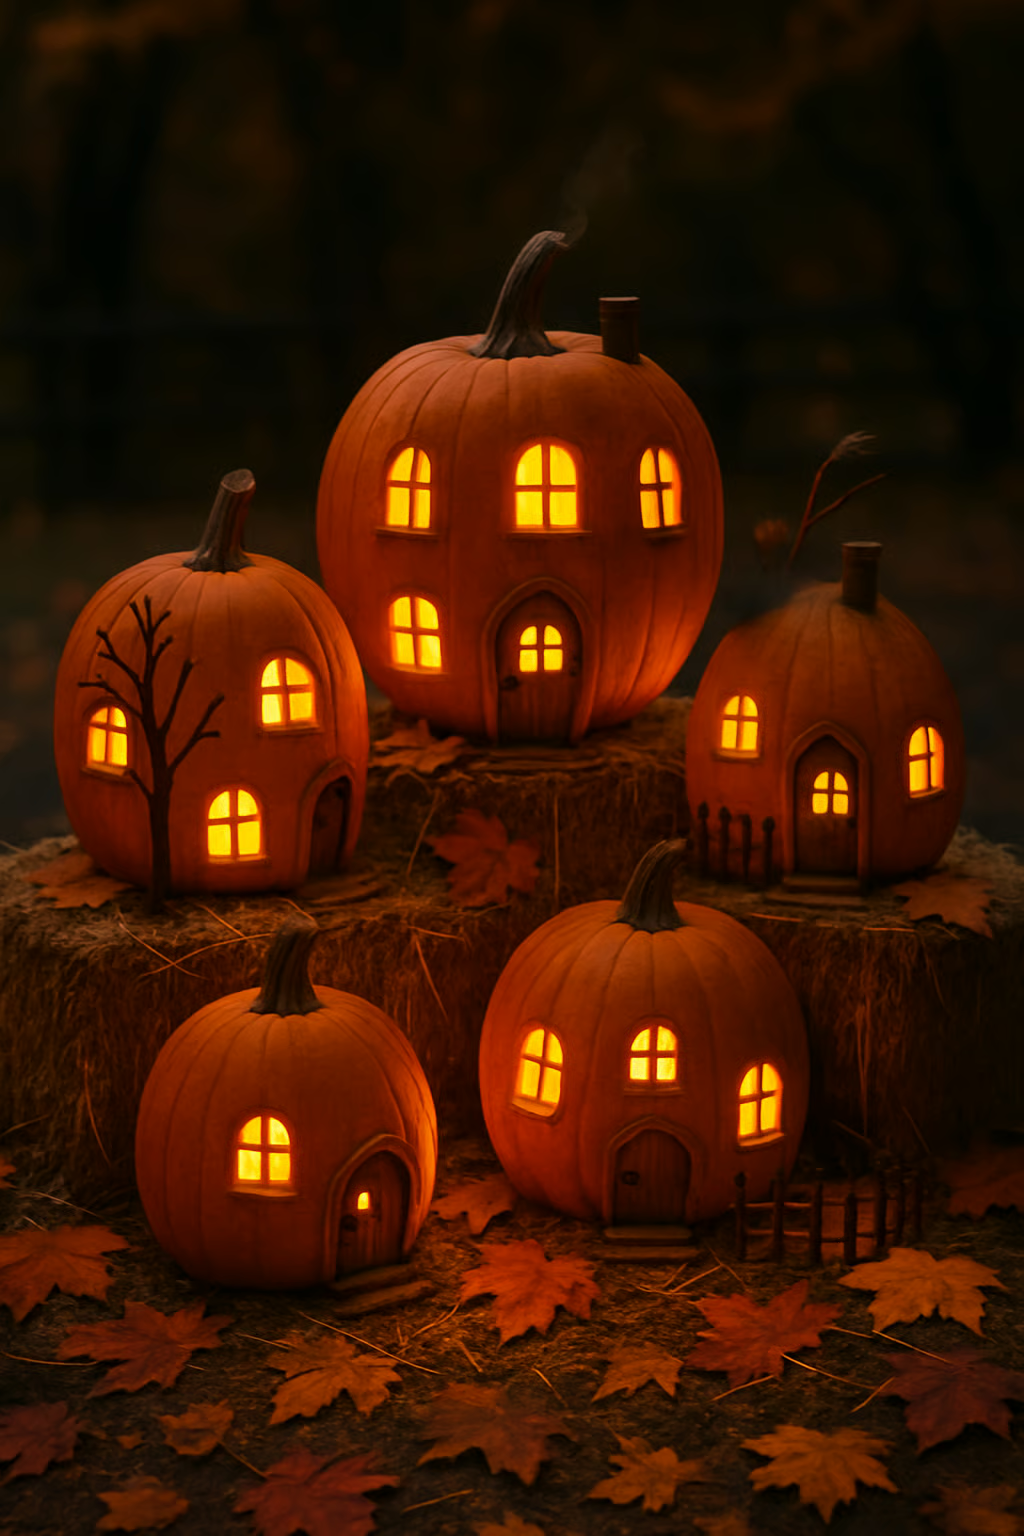
Create a small village scene by carving windows and doors into pumpkins of different sizes. Arrange them along porch steps or a patio ledge to resemble a row of cottages. This setup works well as part of fall patio decor and blends with other seasonal accents.
Add details to make the village more realistic. Cinnamon sticks work as chimneys, while twigs or dried moss create fences and trees. Small tea lights or battery candles inside each pumpkin add a warm glow without being overwhelming.
Experiment with placement to fit your space. A cluster of pumpkins on porch steps forms a layered display, while a line of gourds across a console or entryway creates a neat row of houses. Photograph each version to decide which arrangement works best for your front porch pumpkins display.
Mix carved pumpkins with uncarved ones for balance. Painted gourds or plain squash can serve as background pieces, giving the carved cottages more focus. This approach keeps the scene simple while still offering a unique twist on traditional pumpkin porch display ideas.
Arch of Embers
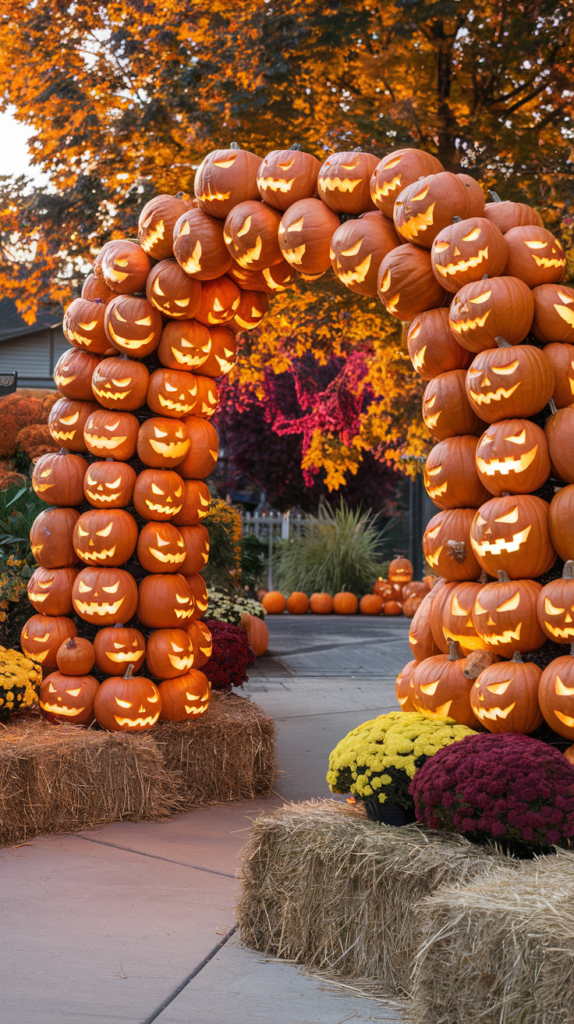
Build an inviting entryway by arranging carved pumpkins into an arch that frames your path or patio door. This design works well as part of an outdoor Halloween pumpkin display and makes a bold statement for fall patio decor.
Mix traditional jack o’ lantern faces with simple shapes like stars or moons. This balance allows both beginners and experienced carvers to take part while keeping the look interesting. A variety of designs adds depth to your front porch pumpkins display.
Keep the structure stable by sliding pumpkins onto rebar or PVC pipe, then securing them with zip ties. This prevents shifting and helps the arch hold up against wind or foot traffic.
Use LED lights inside each pumpkin for a safe glow. They highlight the carvings and create an inviting atmosphere for Halloween porch decorating ideas. Soft lighting also makes the arch easy to enjoy at night without open flames.
Placing the arch at the start of your walkway or directly over the front steps turns it into a focal point. It blends well with other pumpkin display ideas front yard and sets the stage for the rest of your seasonal decor.
Once Upon a Gourd
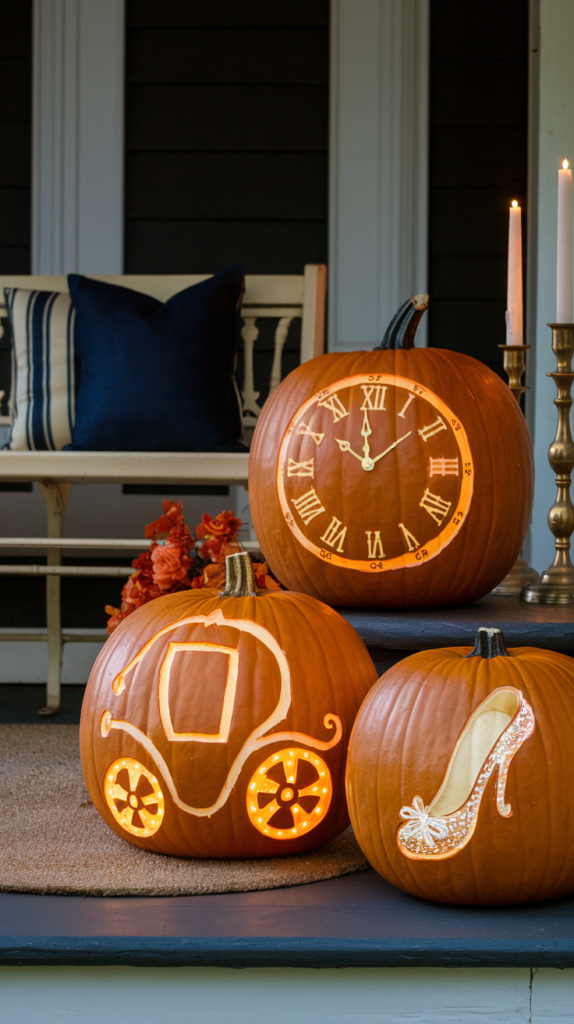
Bring a story to life on your front porch with a row of gourds or pumpkins carved in sequence. A simple three-part tale works best, such as a carriage, a clock striking midnight, and a glass slipper. Each step of the story adds interest as visitors move past your display.
Arrange the pumpkins on porch steps so the story unfolds naturally. Place the first design at the bottom, the second in the middle, and the final image at the top. This layout creates a clear path for the eye and makes the arrangement easy to follow.
Pair the carvings with neutral accents to keep the focus on the pumpkins. A plain doormat grounds the scene, while metallic candlesticks add a soft glow. This balance helps the display feel polished without distracting from the main story.
For extra charm, mix in uncarved gourds or small pumpkins on the side. These fillers give the front porch pumpkins display more depth and variety. Together, the carved sequence and natural accents create a porch setup that feels planned and inviting.
Trail of Spirits
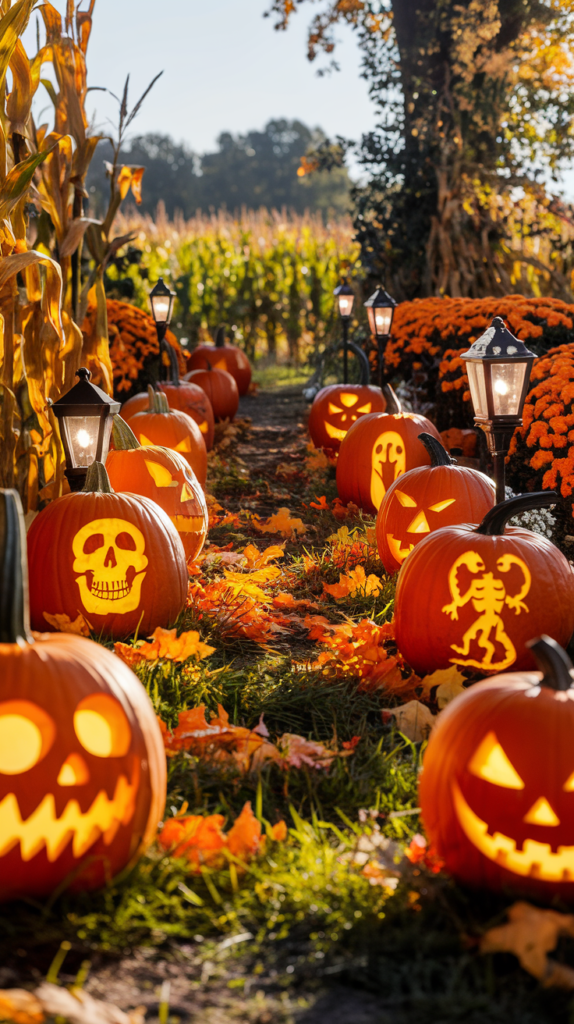
Line your porch steps or walkway with pumpkins carved in simple ghost shapes and small footprints. Arrange them so the figures appear to move forward, creating a clear path that works well in both daylight and evening light. Keep the designs bold and uncomplicated so the shapes remain easy to recognize.
Mix different pumpkin sizes to build variety in your outdoor Halloween pumpkin display. Smaller pumpkins work well for the “footprints,” while medium or larger pumpkins help anchor the ghost carvings. This mix makes the trail feel more natural and helps guide the eye along the path.
Add seasonal details to connect the display with your fall patio decor. Leaf piles, lanterns, and corn stalks placed near the pumpkins add warmth and texture. These elements frame the carved designs without distracting from them.
A printable spacing guide helps keep the rhythm of the trail consistent. Even spacing between pumpkins ensures the ghostly path looks intentional and balanced. This small planning step makes the final display more polished and easy to follow.
Carnival of Shadows
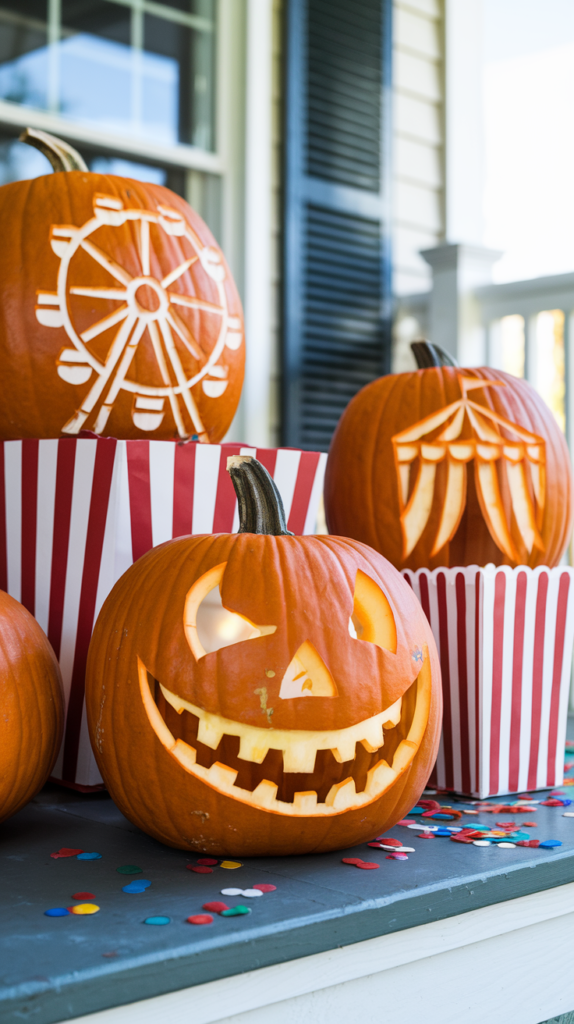
Set the stage on your porch with a pumpkin Ferris wheel silhouette that glows after dark. This design works well as part of a larger outdoor Halloween pumpkin display, especially when paired with smaller pumpkins carved as carnival rides or game booth signs.
A bold clown grin carved into one pumpkin adds a playful centerpiece. Keep the style lighthearted with rounded shapes and bright paint accents instead of sharp edges. This approach creates a fun pumpkin porch display that feels festive rather than frightening.
For extra detail, carve or paint striped tent patterns on a few pumpkins. Arrange them in rows along your steps or porch railings to echo a carnival midway. Mixing carved and painted designs makes the front porch pumpkins display more dynamic.
Ticket-style tags, paper popcorn boxes, or small banners add clear carnival cues. These props help tie the pumpkin front porch decor together and make the theme easy to recognize.
Bright colors and simple shapes keep the scene cheerful while still fitting the Halloween season. With careful placement, the setup transforms your porch into a playful carnival of shadows that welcomes guests with creativity and charm.
Monogrammed Magic
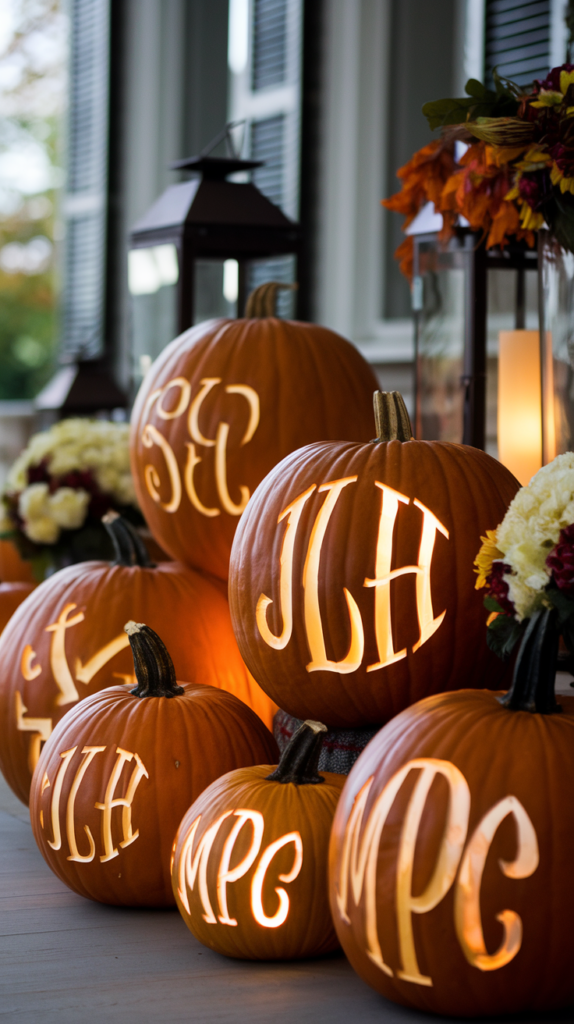
Carving a single letter or family crest into a pumpkin gives your display a polished look. Medium-sized pumpkins work best for this style because they provide enough surface area for clean, bold lines. A simple serif font paired with a laurel wreath or border keeps the design classic.
Place monogrammed pumpkins near lanterns or planters for an inviting front porch pumpkins display. The glow from inside the pumpkin highlights the carved letter, making it stand out during evening hours. This setup works well as part of larger pumpkin arrangements front porch ideas.
For fall front porch styling, coordinate your monogram with doormats, ribbon colors, or seasonal accents. Matching tones across these details creates a unified look that feels intentional. The result is an easy upgrade that looks custom without requiring complicated carving skills.
Monogrammed pumpkins also blend well with creative fall porch ideas that mix textures and layers. Try grouping them with mums, hay bales, or neutral planters to balance the design. This approach keeps the focus on the monogram while still celebrating the season.
The Great Pumpkin Mosaic
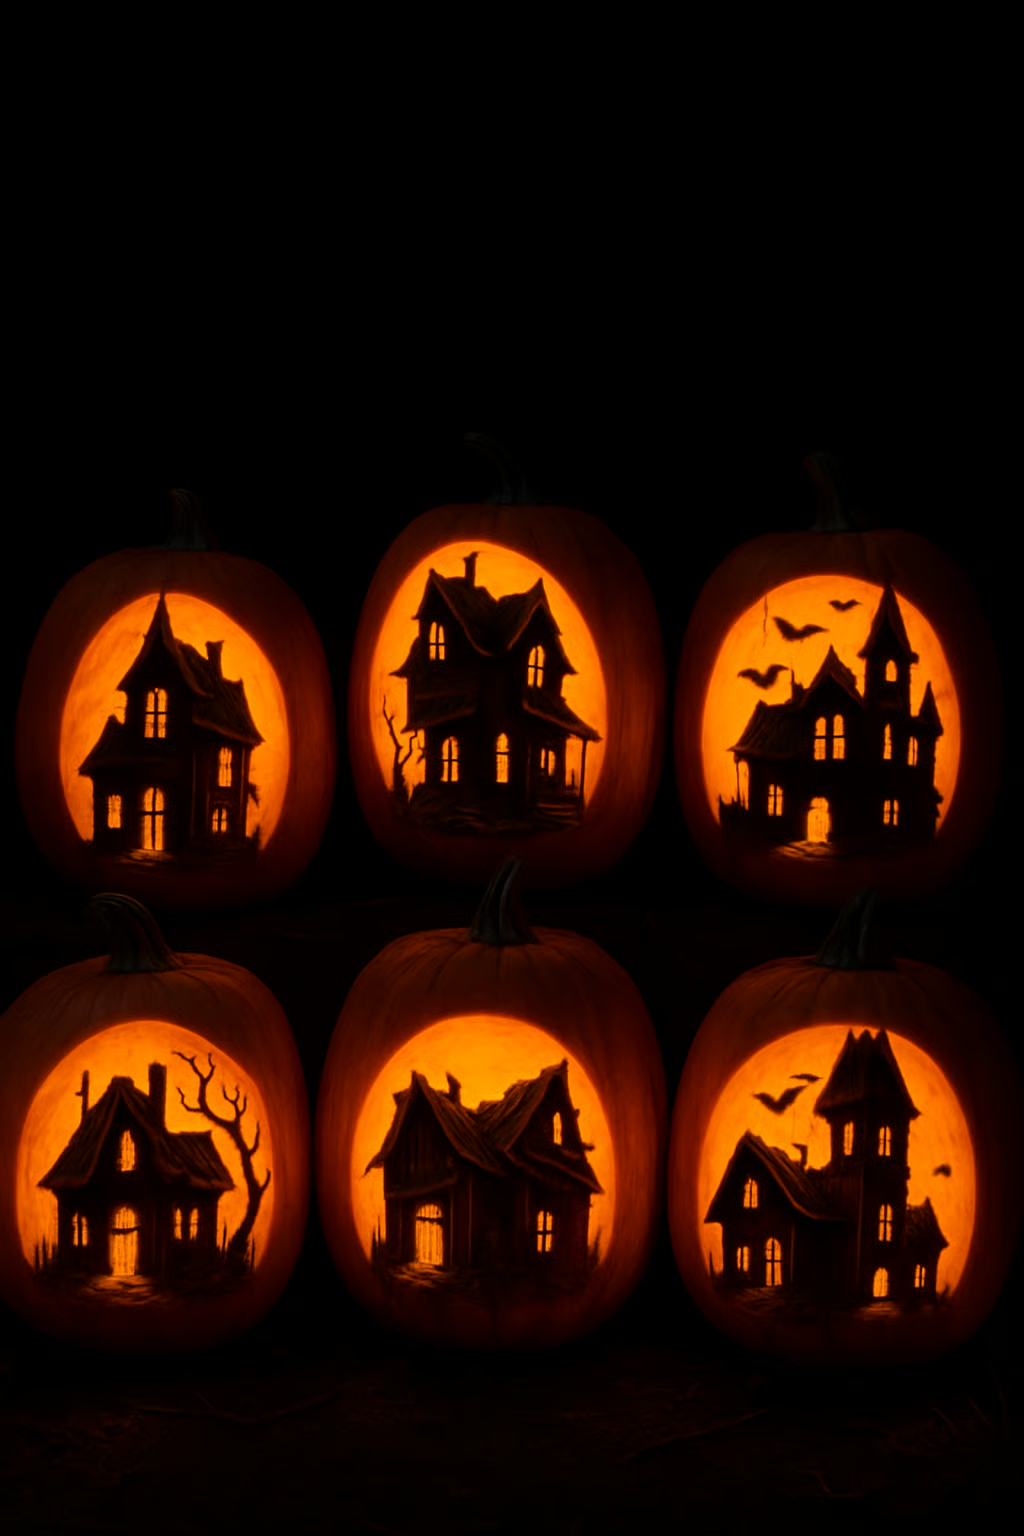
Arrange several pumpkins together to form one large design instead of focusing on a single carving. By placing them in a grid on shelving or stacked crates, the group creates a striking outdoor Halloween pumpkin display that looks impressive from the street.
Keep each carving simple, such as a circle, triangle, or square cutout. When lit, the shapes combine into a bigger picture like a haunted house, a tree in fall, or even a cat silhouette. This approach saves time while still giving your pumpkin porch display ideas a bold effect.
Place the mosaic on porch steps or along a front porch pumpkins display to make the design stand out at night. A printable grid plan helps divide the image so each pumpkin has a clear role in the final look.
This style works well as pumpkin front porch decor because it fills space without needing complex individual carvings. The more pumpkins added, the larger and sharper the image appears, making it a flexible option for any size porch.
Choosing the Right Pumpkin
The pumpkin you pick will affect both the carving process and how long the design lasts. A strong stem, firm skin, and the right size for your design make carving easier and help the lantern hold up longer.
Selecting the Best Size and Shape
A medium to large pumpkin works best for most jack-o-lantern designs. Smaller pumpkins often have thicker walls, which makes carving detailed patterns harder. Larger pumpkins provide more surface area for creative faces or scenes.
Look for a pumpkin with a flat bottom so it stays steady once carved. An uneven base can cause it to roll or tip over. A round or oval shape usually gives the most carving flexibility.
Inspect the skin for firmness. Soft spots may mean the pumpkin is starting to rot, which shortens its life after carving. A sturdy stem is also a good sign of freshness.
If planning a simple design, a smaller pumpkin may be easier to handle. For intricate patterns, a taller or wider pumpkin gives more room to work with.
Quick guide for size and shape:
- Small (under 8 inches): best for cooking, not carving
- Medium (8–12 inches): good balance of size and ease
- Large (12+ inches): ideal for detailed designs
Tips for Long-Lasting Jack O Lanterns
Pumpkins begin to dry out and decay quickly once carved. Choosing one with firm, unblemished skin helps slow this process. Avoid pumpkins with deep cuts, cracks, or bruises.
Store the pumpkin in a cool, shaded area before carving. Heat and direct sun speed up rotting. After carving, keeping it in a cool spot at night helps preserve its shape.
Scrape the inside walls to about 1 inch thick. This makes carving easier and reduces moisture that can lead to mold. Remove as many seeds and stringy parts as possible.
Moisture control is key. Lightly coating cut edges with petroleum jelly or vegetable oil helps seal in freshness. Some people also use a diluted bleach spray to reduce bacteria and mold growth.
If the pumpkin starts to shrivel, soaking it in cold water for a few hours can restore firmness for a short time. This works best when done early, before it collapses.
Carving and Decorating Techniques
Pumpkin decorating works best when you use the right tools, follow safe steps, and try different methods beyond basic cutting. Carving, painting, and adding small details all help create designs that stand out on a porch or table.
Essential Tools and Safety Tips
Start with a sturdy pumpkin carving kit instead of kitchen knives. Kits usually include serrated saws, scoops, and pokers designed for pumpkins. These tools cut more smoothly and reduce the chance of slipping.
Keep your workspace well lit and steady. A damp towel under the pumpkin prevents rolling. Always cut away from your body and keep hands dry to avoid accidents.
For children, use plastic carving tools or focus on decorating without sharp blades. Marking the design with a washable marker before cutting helps guide your work.
Basic tool checklist:
- Pumpkin carving saw
- Large scoop or spoon
- Fine detail knife
- Washable marker
- Stencil or pattern sheet
Creative Carving Methods
Simple triangle eyes and jagged mouths work, but more techniques give your design character. Try shaving the pumpkin skin instead of cutting all the way through. This creates a glowing effect when lit from inside.
Layered carving adds depth by removing different thicknesses of pumpkin flesh. Use a gouge or clay loop tool for this method. It works well for patterns like leaves, skulls, or geometric shapes.
Drilling small holes in patterns makes starry or dotted designs. A handheld drill with various bit sizes creates clean circles. This method is quick and looks striking when a candle or LED light shines through.
Stencil carving helps achieve neat results. Tape the stencil to the pumpkin, poke small guide holes along the lines, then cut or shave along the dotted outline.
Painting and Accessorizing Ideas
Painting avoids the mess of carving and extends the life of the pumpkin. Acrylic paint sticks well to the surface once it is cleaned and dried. Use black and white for bold contrast or bright colors for playful designs.
Markers work for fine details like teeth or patterns. Metallic paints or glow-in-the-dark paint add extra effect at night.
Accessories bring more personality. Glue on fake flowers, felt shapes, or googly eyes. Add a hat, mask, or scarf for a themed look.
For a festive twist, decorate with Day of the Dead skull patterns, spiderwebs, or simple polka dots. Mixing paint with small carved cuts creates a layered design that combines both methods.

