How to Tile Outdoor Kitchen Countertops
Tiling Outdoor Countertops in 5 Steps
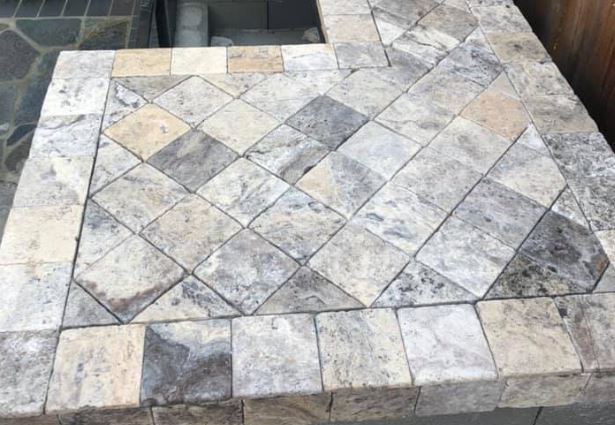
Tile will give you the most choices of any outdoor countertop choice because of the wide number of tile manufacturers, styles, sizes and colors of tile. The choices are practically endless. Because of this, you can create a one-of-a-kind countertop that will serve you well for many years to come.
The process for tiling an outdoor kitchen countertop shares many steps with other tiling projects you may have done in the past. There are a few differences that distinguish outdoor tiling from indoor tiling having to do with climate and weather conditions.
Choosing Materials
You will be using exterior grade plywood for your countertop decking, not interior grade. This product uses special glues in the plywood that won’t deteriorate from the weather. You may have used exterior grade plywood when making your cabinet boxes and this would be the same.
There are many type of tiles than you can choose from for your outdoor kitchen. These include ceramic tile, porcelain tile, natural stone, slate tile and granite or marble tiles. Granite countertops are popular, even outdoors. But their price and fabrication usually preclude them from being an economical choice.
The type of tile you choose should withstand the climate variances in your location. Porcelain tile is a less porous type of tile and is preferable to a ceramic tile countertop. Natural stone is a beautiful addition to any outdoor kitchen and elevates the look of your kitchen countertops.
Your choice for an outdoor kitchen countertop should be easy to clean and fit your DIY skills if you will be installing it yourself.
Steps to Tile Outdoor Countertops
1 Install cement backer board
Tile is never applied directly over plywood in exterior applications. You need to install cement board over your exterior plywood decking. Measure and cut the cement board to size and screw into the plywood every 6 inches or so.
Make any cutouts such as for a sink or burners with a Saws-All or reciprocating saw.
Tape any joints in the cement board with mesh tape and apply thinset mortar to the taped joint with a trowel.
2 Lay tiles without mortar
This part of the process is to make sure you have a pleasing arrangement of tiles on your counter space.
Dry lay a full tile at the center of the counter, or at the corner if your countertop is L-shaped or U-shaped. This will make sure you don’t have awkward cuts in problematic spots. Lay more tiles so that you can see where you will need to make cuts and where your grout lines will be. The larger the tile, the more important this is. Small 4×4 tiles or mosaic tiles are easier to manipulate, large tiles not so much. Use chalk lines to mark where your tile lines should be.
Choosing tile with an obvious pattern or large repeat makes this step a little more problematic. Dry laying your tile will avoid surprises later.
3 Thinset Mortar
Apply thin set mortar to the backer board’s surface with a trowel after dampening the cement board. The flat side of a trowel should be used to push the thin set onto the surface in order to push the mortar into the substrate. Holding the trowel at a 45-degree angle with the notched side down, comb the thinset mortar until it is a uniform thickness all the way through. Make sure the tiles are level, and only apply as much thinset as you can lay tiles in 15 minutes.
Back butter each tile. On top of the mortar, arrange the tiles in the pattern of your choice. To set the tiles, gently press each one into the mortar. If necessary, use plastic or wooden spacers to evenly space the tiles.
Lightly tap the tiles with a rubber mallet to get them to set and eliminate any high tiles. Make sure you don’t tap too hard, otherwise the tiles may break. Lifting a tile, adding some thin set, and resetting it will correct a tile that is too low. You can use a level to ensure that your tile outdoor kitchen countertop is level from tile to tile, side to side and front to back.
4 Finish Laying the Tiles
To tile the entire counter, repeat the above procedure for every tile.
Here are a few tips to keep in mind:
- Don’t forget to remove any surplus thin set from the joints.
- Larger tiles should be cut with a wet saw for straighter lines. You can use a nipper on small tiles to make l-shaped cuts or rounded cuts.
- After you’ve finished laying all of the tiles, allow at least 24 hours for the surface to dry and the mortar to set before applying the grout.
5 Grouting
The next step is to grout the tile. Use a darker grout choice for outdoor countertops as lighter shades will stain over time and not look as good as they did when first installed.
The grout should be mixed according to the manufacturer’s recommendations. Grout should be used to fill up the gaps between the tiles. Pulling a grout float diagonally across the surface of the tiles will remove any excess grout that has accumulated. Allow the grout to cure until the surface is hazy, about 15 minutes.
Remove any grout from the surface of the tiles by wiping each down with a damp sponge.
Trim the edge of your outdoor countertops, if desired, with wood or metal trim unless you have installed bullnose tiles.
Tile countertops, if properly installed, will not be too difficult to clean and will add to the personality of your outdoor kitchen design.


