No-Carve Pumpkin Decorating
17 No-Carve Pumpkin Decorating Ideas That Deserve a Spot on Your Fall Party Table
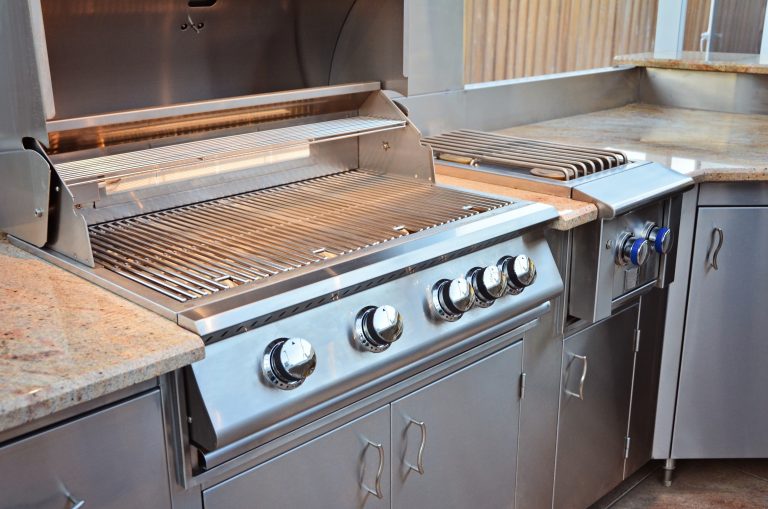
Decorating pumpkins for fall or Halloween doesn’t have to be messy or hard. With no-carve pumpkin decorating ideas, you can make your pumpkins look stylish and creative without using sharp tools or making a big mess.

You’ll find smart and beautiful ways to create pumpkins that are perfect for parties or backyard get-togethers. These no-carve ideas let you show off your style while keeping things simple and safe.
Botanical Transfer No-Carve Pumpkin Decorating
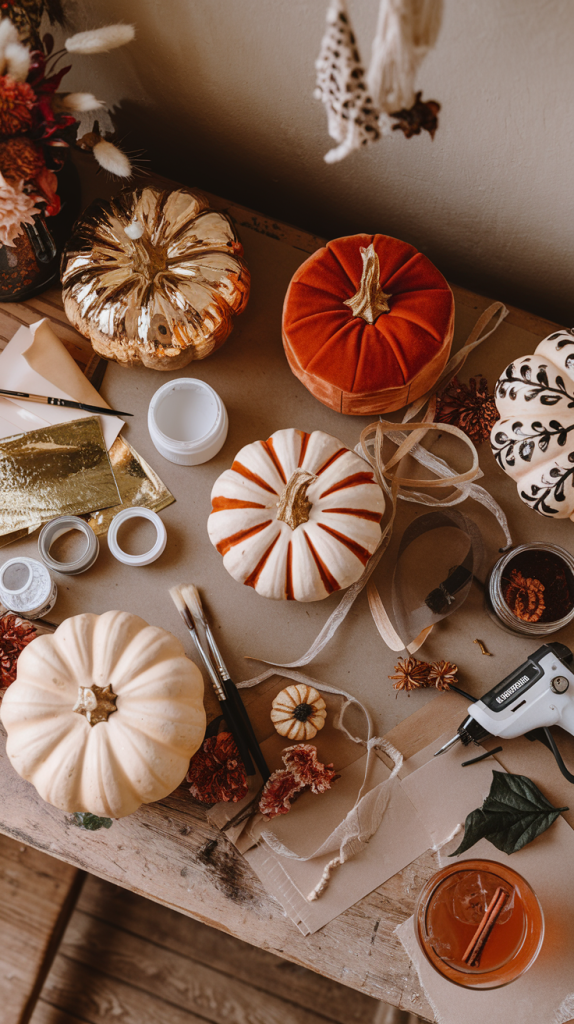
Bring a bit of nature to your fall decor with botanical transfer pumpkins. You only need a few dried flowers, some delicate leaves, and a little Mod Podge to get started. Gently press flowers or small sprigs of herbs onto white or pale pumpkins for a look inspired by cottage gardens.
Arrange these beautiful pumpkins along your backyard path to greet guests with soft, natural color. Set them at the center of your outdoor dining table for a romantic, handmade feel that pairs beautifully with rustic linens and candles.
Mix and match flowers for a custom display that fits your party style. Choose muted colors for a subtle look or brighter blooms for cheerful pops of color. Botanical transfer pumpkins are easy to make and look wonderfully thoughtful at any backyard gathering.
This idea is perfect if you love garden-inspired decorating or want something different than the usual Halloween decorations. With just a little effort, you can create pumpkins that look high-end and truly unique. Your guests will be surprised they’re so simple to make!
Charcuterie Pumpkin
Turn your pumpkin into a clever centerpiece by making it the base for a charcuterie board.
Choose a flat pumpkin and wipe it clean. Place a smooth wooden round on top, securing it with museum putty so it stays in place but can be removed later.
Arrange slices of cheese, cured meats, crackers, and clusters of grapes right on the board. You can add nuts, dried fruit, or sprigs of rosemary for extra style.
This idea does double duty. It catches the eye, and your guests can snack while they mingle. The seasonal twist makes it perfect for backyard parties, combining autumn decor with a practical serving spot.
With a charcuterie pumpkin, you get a high-end look without much fuss. It’s both fun and functional, sure to please anyone who stops by your gathering.
Coastal-Inspired Rope Pumpkins
Give your pumpkins a breezy, beachy look by wrapping them with sisal or cotton rope. Start at the top or bottom, and spiral the rope around the pumpkin until it’s covered. Leave a little space between the coils to show off some of the orange or white skin underneath for a modern touch.
For a nautical feel, try laying rope in crisscross patterns to mimic the look of fishing nets. You can tuck the ends under the rope or secure them with hot glue. Using natural-colored rope gives your pumpkins that authentic coastal style.
Finish your No-Carve Pumpkin design with real or faux seashells, a small starfish, or a piece of weathered driftwood as a stem. These accents help your rope pumpkins stand out at any backyard party. Place a few on your patio or porch for an easy, stylish update to your fall decor.
Disco Ball Pumpkins
Want to make your backyard party pop? Try making disco ball pumpkins. These pumpkins shine and reflect light, which always grabs attention.
Start with a real or fake pumpkin and cover it in tiny mirror tiles or metallic foil squares. You can find these tiles at craft stores or online. Attach them using hot glue for a neat effect.
When you set these pumpkins near candles or string lights, they shimmer and create cool reflections around your space. Group several disco ball pumpkins together for even more sparkle.
For extra glamour, place them on your outdoor drink table or beside your seating area. They add fun and style without any mess from carving. Kids and adults will enjoy the cheerful look all night long.
Velvet-Wrapped Pumpkins
You can turn ordinary pumpkins into eye-catching centerpieces by wrapping them in velvet. Choose rich colors like emerald, sapphire, or burgundy for an upscale look that stands out at any backyard party.
Start by cutting a square of velvet large enough to cover your pumpkin. Gather the fabric at the stem, tucking it underneath, and secure it with hot glue for a smooth finish.
For added interest, use gold pins, vintage brooches, or pearl accents. These details will make your pumpkins look even more stylish on your autumn table.
Mix and match different velvet shades to create a plush display. Group several together for a stunning, layered effect that draws attention.
Velvet-wrapped pumpkins are soft to the touch and look great under string lights or candlelight. They add warmth and charm without any carving required.
Beaded Boho Pumpkins
For a high-end boho look this fall, you can decorate your pumpkins with wooden beads and macramé cord. Start by wrapping the pumpkin stem in jute for a natural touch. This simple detail makes your pumpkin look handcrafted and unique.
Next, drape strands of wooden beads around the pumpkin’s body. Use neutral colors like cream, beige, or light brown to keep the look soft. You can tie the beads at different heights and let them hang for a relaxed feel.
Macramé cord also works great for creating boho patterns. Try tying a simple knot design around the top or base of your pumpkin. The cord adds texture and interest without overwhelming the natural shape.
Place your finished beaded pumpkins in big woven baskets or on wooden trays. This helps them fit right in at any backyard party or on your porch. Mix in a few plants or cozy blankets to finish off your setup.
Combining beads, cord, and baskets turns an ordinary pumpkin into a standout display. You don’t need carving tools or paint—just a little creativity and some easy supplies.
Stencil-Stamped Pumpkins
Stencil-stamped pumpkins add a crisp, modern element to your backyard party. You can use bold patterns or delicate details for a unique look. Pick stencils with garden motifs like leaves, honey bees, or lattice shapes.
Choose paint colors that contrast nicely with your pumpkin. Soft blues or matte whites look elegant on classic orange, while metallic gold on white pumpkins feels extra fancy. Secure your stencil with tape before painting to keep lines neat and sharp.
Arrange your decorated pumpkins along your patio steps or mix them in with pots around your garden. They bring an artful style and stand out without being too flashy. This easy no-carve idea also keeps your party cleanup simple—just pack the pumpkins up after your event.
Tiled Mosaic Pumpkins
You can turn plain pumpkins into beautiful works of art by covering them with small mosaic tiles, broken plates, or colorful glass pieces. These supplies let you add a splash of color and texture that looks great in any backyard setting. Arrange the pieces in creative patterns for eye-catching designs.
Use a strong, clear-drying glue or traditional grout to hold each piece in place. Work in small sections so the pumpkin doesn’t become too messy or hard to handle. Pick colors and shapes that match your party theme or outdoor decor.
Tiled mosaic pumpkins look especially striking when light hits them, making them perfect for garden tables or patio corners during outdoor gatherings. They add a Mediterranean vibe and a bit of sparkle that real pumpkins just can’t match. Guests will notice your creativity and unique style.
If you use faux pumpkins, your tiled mosaic art can last season after season, so you can enjoy them every fall. The best part with this no-carve pumpkin is, you don’t need to carve anything, so there’s no mess to clean up. decorating
Paint-Poured Pumpkins
A paint-poured no-carve pumpkin gives your backyard party a modern and stylish look. You can use this simple technique to create beautiful, abstract designs without needing carving tools.
Start by picking a pumpkin in a shape you like. Choose paint colors that match your fall theme, such as deep oranges, golds, or metallic shades. Place your pumpkin on a covered surface to catch any drips.
Pour paint slowly over the top of the pumpkin and let it flow down the sides. You can use more than one color for a layered, swirling effect. Don’t worry about making perfect lines—the random paint drips create a unique look every time.
Metallic paints add a chic and shiny finish. You can even sprinkle a little glitter on the wet paint if you want extra sparkle. Once the paint dries, your paint-poured pumpkin is ready for the party.
These pumpkins stand out as creative table centerpieces or accent pieces around your yard. They’re easy to make, mess-free, and sure to impress your guests.
Feathered Pumpkins
Feathered pumpkins are a creative way to add texture and style to your fall decorations. You can choose rich autumn colors, like deep orange, burnt red, and gold, for a truly seasonal look.
Start by picking out craft feathers in different shapes and shades. Pheasant plumes or long, soft feathers work well if you want something a bit fancier. Attach them to your pumpkin with hot glue.
For a striking effect, place feathers in swirling patterns or layer them in neat rows. Try mixing different directions and lengths. This makes your pumpkin look curated and unique.
A feathered pumpkin looks amazing on a rustic wooden table or as the centerpiece for a backyard party. The soft texture is unexpected and brings a high-end touch to your decor.
Mix in natural accents, like twine or yarn, to complete the look. Your guests will love the clever use of feathers, and it’s a mess-free project you can finish quickly.
Chinoiserie No-Carve Pumpkin
If you want to bring an upscale and artistic eye to your pumpkin décor, try making chinoiserie pumpkins. These pumpkins use blue-and-white patterns, inspired by traditional Asian ceramics, to create beautiful and unique fall decorations.
Start by choosing a few white pumpkins for the best backdrop. Next, decoupage blue-and-white napkins or tissue paper onto the pumpkins using Mod Podge or similar glue. Gently smooth the tissue over the pumpkin’s surface, making sure to press out any wrinkles.
Once dry, your pumpkins will have an elegant, hand-painted look. These chinoiserie pumpkins shine on a patio table or as a centerpiece for outdoor gatherings. Pair them with classic navy or white linens to match the refined look.
You can also add a few gold accents, like painted stems or thin ribbons, to make the design pop even more. This style makes your pumpkins look chic and festive without much effort.
Glow-in-the-Dark Dot Pumpkins
Bring a magical glow to your evening parties with glow-in-the-dark dot pumpkins. Use white or orange pumpkins as your base, and pick up some glow-in-the-dark paint from any craft store.
To make the dots, you can use a paintbrush or even a cotton swab. Try different sizes of dots for extra flair. Make scattered polka dots, star-like constellations, or swirling patterns across your pumpkin.
For a modern look, try neon or pastel glow paints. Arrange several dot pumpkins together for a stunning backyard display. After sunset, these pumpkins shine and create a playful, eye-catching effect.
Put your glowing pumpkins near the patio or by the fire pit. They’re especially fun for outdoor movie nights or parties, adding a unique twist to your fall decor.
Mudcloth-Inspired Painted No-Carve Pumpkin
For a bold and modern look, try painting your pumpkins with mudcloth-inspired designs. Start with a smooth, black base coat. Use a small brush and white acrylic paint to draw crisp, repeating lines and simple shapes.
Focus on geometric patterns like dots, zigzags, arrows, and parallel stripes. These shapes mimic traditional African textiles and add a trendy, tribal-chic appeal.
Group several of these patterned pumpkins together for a dramatic effect at your next backyard party. They look amazing on outdoor tables, along walkways, or nestled among greenery.
The sharp black and white contrast works with many styles. Pair with neutral linens, woven baskets, or metallic accents for a clean, high-end vibe. Guests will notice the unique style and creative details.
This idea is easy to customize. Use real or faux pumpkins, and vary the designs on each one. Let your creativity guide the patterns, and enjoy a simple project that makes a big visual impact.
Marbled Clay Accent Pumpkins
You can easily create a designer look with marbled clay accent pumpkins.
Start by rolling together a few colors of polymer clay—think deep orange, gold, and white. Gently twist and fold the clay until you see subtle swirls. Next, shape the clay into leaf cutouts, stripes, or simple arches.
Press your marbled shapes onto the pumpkin. You don’t have to cover the entire surface; a few accents go a long way. Arrange the pieces in patterns or scatter them for a relaxed look.
Once the clay accents are in place, follow the clay’s baking instructions if needed. The result is a one-of-a-kind display that gives your pumpkin a modern, high-end touch.
Place your marbled accent pumpkins on a backyard party table or porch. Their unique textures and swirled colors will draw attention, especially when paired with candles or greenery. These pumpkins blend perfectly into stylish outdoor fall decor.
Pumpkin Terrarium Domes
You can turn pumpkins into stunning terrarium domes for a unique fall look. Start by carefully hollowing out just the top of your pumpkin. Next, fill the opening with soft moss, miniature gourds, and tiny plants or succulents.
Add a few fairy lights for a warm glow. Cover your creation with a glass cloche or a clear plastic dome, like a cut-open ornament. This creates a cozy, high-end display that looks great both during the day and at night.
Try placing your terrarium domes on buffet tables or tucking them into potted plants on your patio. They make eye-catching decorations for a backyard party. Guests will love the tiny fairy garden feel and the creative use of pumpkins.
Mix up the look by using different shapes and sizes, or swap in fall leaves and acorns to match your outdoor space. The best part is you don’t need to carve or paint, so there’s less mess to clean up afterward. Each dome is one of a kind and sure to impress.
Painted Pumpkin Topiary Trio
Bring your backyard party decor up a notch with a painted no-carve pumpkin topiary trio. Start by picking three pumpkins in different sizes so you can stack them easily. Choose bold painted patterns for each pumpkin, such as a classic checkerboard, a smooth ombré fade, or an artsy terrazzo design.
Paint each pumpkin with your chosen look and let them dry completely. Use a wooden dowel to run through the center of all three pumpkins, stacking them from largest on the bottom to smallest on top. A sturdy, hidden base keeps your topiary stable, even outdoors.
This trio creates a striking vertical centerpiece for any outdoor space. Place it near your entryway, beside your bar, or next to your fire pit to draw everyone’s attention. It’s a clever, creative way to wow your guests and add instant color and height to your fall decor.
Faux Metal Foil Leaf Pumpkins
For a chic take on pumpkin decorating, try using faux metal foil leaves. Pick shiny foils in copper, rose gold, or champagne for a rich and stylish look that feels special. Faux pumpkins work best, but you can use real ones, too.
Gently brush adhesive onto your pumpkin wherever you want the metal shine. Apply metal leaf in torn patches, or use stencils to make patterns like vines or tiny stars. The foil sticks and adds a soft shimmer without much effort.
These no-carve pumpkin decorations look stunning when grouped together on an outdoor table. As candlelight or string lights hit the foil, your pumpkins will catch and reflect the glow. It’s an easy way to bring a fancy vibe to your backyard party.
You don’t need advanced art skills—just patience and a gentle touch. Try mixing different metal shades for even more visual impact. Add a few to your fall centerpiece or porch for instant high-end style.
Choosing the Right Pumpkin
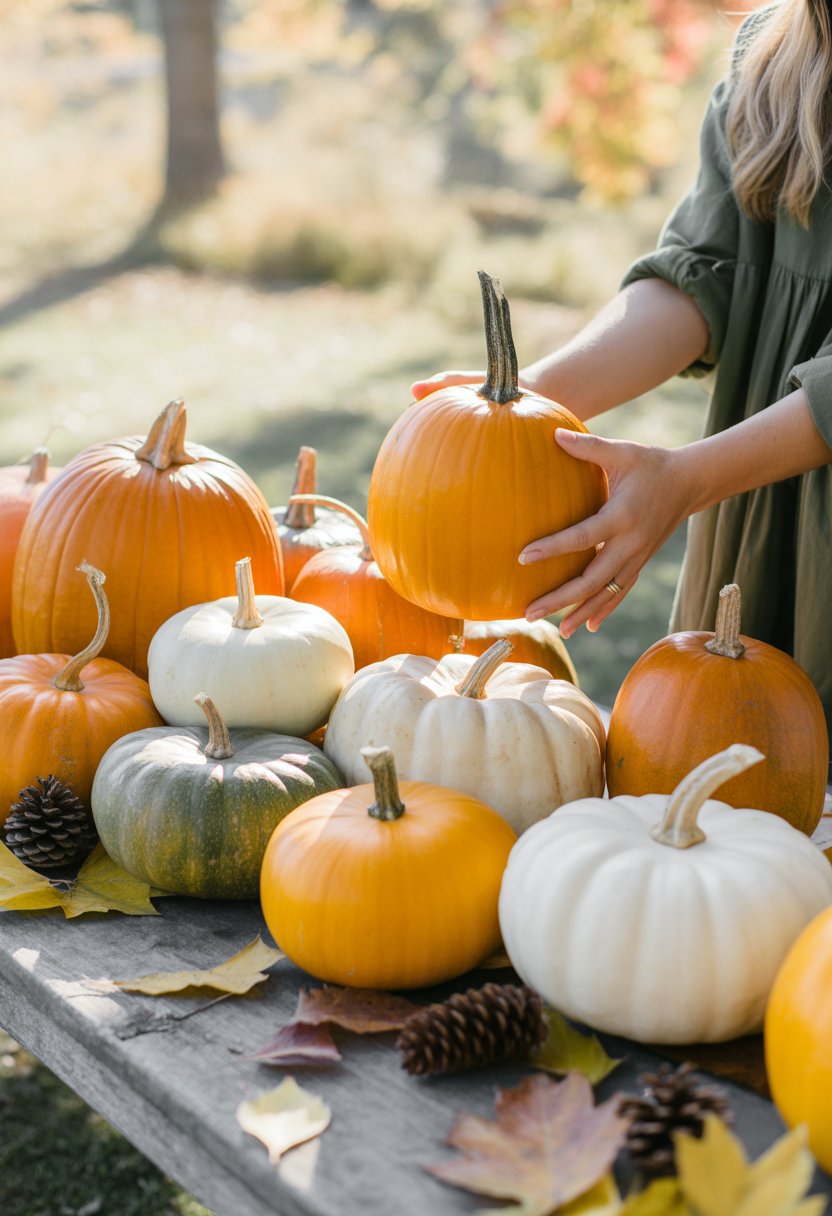
To get a polished, high-end look for your no-carve decorations, it’s important to select the proper pumpkin and prepare it well. The type you choose, along with a bit of early prep, helps your designs stand out and last longer.
Best Pumpkin Varieties for No-Carve Pumpkin Decorating
Look for pumpkins with smooth, even surfaces. These give you the best base for paint, stickers, or other creative touches. The classic Sugar Pie pumpkin is popular because it’s round and has very few bumps. Ghost pumpkins (white in color) offer a modern look and make gold or black designs pop.
If you want subtle texture, go for the “Cinderella” or “Fairytale” pumpkins. Their wide, flat shapes are perfect for placing on tables and look elegant at outdoor parties. Mini varieties like Jack Be Little are fun for arrangements or adding to centerpieces.
When picking, check for a sturdy, green stem—this means your pumpkin is fresh. Avoid soft spots, bruises, or broken stems, as these can lead to rotting sooner. Choose a size that fits your design idea, whether it’s a bold centerpiece or a set of small accent pieces.
| Pumpkin | Color | Texture | Best For |
|---|---|---|---|
| Sugar Pie | Orange | Smooth, round | Painting, bold art |
| Ghost | White | Smooth, oval | Modern, metallics |
| Cinderella | Orange | Flat, ribbed | Table arrangements |
| Jack Be Little | Orange or white | Mini, smooth | Small accents |
Preparation and Cleaning Tips
Start by gently washing your pumpkin with warm water and a drop of mild soap. This removes dirt and helps paint and glue stick better. Pat the pumpkin dry with a towel to prevent moisture from lingering on the skin.
If your pumpkin is a little dirty, use a soft brush or sponge to clean crevices. Don’t scrub too hard, or you might scratch the skin. It’s best to let the pumpkin fully air dry before decorating.
Wipe the surface with a little rubbing alcohol if you plan to use spray paint or strong adhesives. This gets rid of natural oils. For keeping your pumpkin fresh longer, you can rub a thin layer of petroleum jelly on any spots that look dry or scratched.
Always handle pumpkins by the bottom—not the stem—to avoid snapping it off. This keeps your pumpkin looking pristine and ready for any upscale party design you have in mind.
Decorating Materials and Safety
When you decorate pumpkins without carving, you can use many beautiful and creative materials. It’s important you pick supplies that are safe for everyone and gentle on the environment.
Eco-Friendly Supplies
Choosing eco-friendly materials keeps your no-carve pumpkin decor stylish and sustainable. Look for water-based paints instead of spray paint. They are less harmful and still offer bright colors.
Try using compostable glitter made from plants. Regular glitter is usually plastic, which isn’t good for nature. You can also use recycled paper napkins to decoupage your pumpkins for a unique look.
Add natural touches like dried flowers, leaves, or twine for a rustic or boho style. If you love sparkle, wrap your pumpkin in a piece of old fabric or a reusable mesh gift bag. These materials break down more easily or are reusable after your party.
If you want to boost visuals for a party, use soy-based wax crayons to create patterns. Their bold colors and simple application won’t harm the environment.
| Eco-Friendly Material | Example Use |
|---|---|
| Water-based paint | Bold, striped or dipped effects |
| Compostable glitter | Shimmery polka dots |
| Recycled paper | Decoupage details |
| Dried flowers/leaves | Layered accents |
| Old fabric | Textured wraps |
Safe Decorating No-carve Pumpkin Practices for Kids
Decorating pumpkins with children can be safe if you stick to smart choices. Skip sharp tools and choose paint pens, stickers, and washable markers. These options are easy to use and clean up.
Give kids aprons or old shirts to wear, so their clothing stays neat. Set up your decorating table with paper or a plastic sheet you can wipe down. Work in a well-lit area so kids can see what they are doing.
Younger children love googly eyes, felt shapes, and craft foam letters. You can use school glue or double-sided tape to attach decorations. This way, little hands won’t need to use hot glue or anything sharp.
Always supervise kids closely, especially with small items like gems or beads, to prevent choking risks. Let them experiment, but guide them to safer choices for a fun and worry-free decorating session.