How to Waterproof Plywood and Seal It For Outdoor Use
Waterproofing Plywood by Sealing It for Building Outdoor Kitchens
Part 1 – The Basics of Waterproofing Plywood
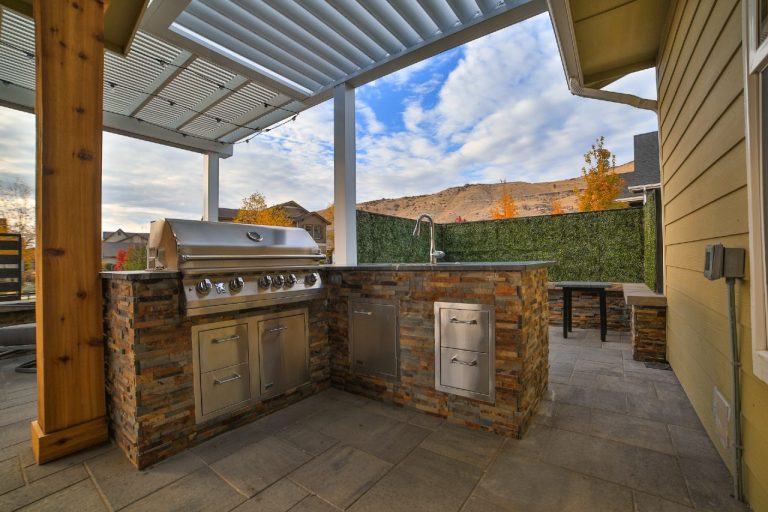
If you’re building an outdoor kitchen, you might have a need for plywood when constructing the cabinet boxes.
Plywood is one of the most durable and long-lasting building and remodeling materials available. This wood is also preferred by many DIYers because to its durability. Plywood is also less expensive than many other types of wood. Unfortunately, outdoor plywood is known to be susceptible to dampness.
Plywood requires sealing to avoid surface cracking, which not only protects it from water damage and decay, but also maintains its long-term performance and endurance.
The woodwork is finished with paint or a strong resin such as polyurethane after it has been sealed. Any hardware shop will have all of the necessary tools for sealing plywood. You must be cautious when preparing the wood in order to make your finished creation more durable.
However, when it comes to sealing uneven surfaces, the sealing job can be challenging. Don’t be concerned! Even difficult surfaces will be easier to seal with our step-by-step tutorial on how to seal plywood for outdoor usage.
The Advantages of Sealing Plywood
There are several advantages to sealing plywood. It will save you money and prevent your wood from rotting.
1. Rotting Prevention
Due to its nature and other reasons such as humidity, all external woods are susceptible to gel mold. A rot damages a piece of wood while also obliterating its attractive appearance. Plywood can be rotted in a variety of ways. Sealing it is the greatest approach to protect it from mildew of any kind.
Properly sealing ply-wood will save you time and money in the long run.
2. Sun and Moisture Protection
When water seeps into plywood, it does more than just create rot. Water can cause wood to shatter if it becomes too wet. This is likely to do significant damage to your plywood. Seal your wood as soon as possible to avoid this from happening.
The timber is also harmed by the sun’s rays. Wood will twist more if it is exposed to the sun for longer periods of time. Wood can lose its natural beauty and structural integrity as a result of this. Plywood can be sealed to help keep its structure and look.
3. Balancing Plywood Sheets
Sealing wood reduces the likelihood of it splitting. Sealing plywood makes it sturdy and resists shrinkage, expansion, and twisting. Wood warping is less likely if the wood surface is balanced.
The following are some of the steps involved in sealing plywood:
- All sides of the plywood are sanded with an 80-grit sandpaper. Sanding in a back-and-forth motion and along the natural grain of the wood is preferable to sanding across the grain.
- Sanding with 120-grit sandpaper is used to achieve a smoother finish. Higher grain sandpaper can be used for an even smoother finish, however it is not necessary in the case of plywood.
- Plywood dust is wiped away using a clean towel. A dust-free and clean area is necessary for applying a sanding sealer. To apply the sealant, you’ll also need a clean paintbrush.
- Sanding sealer is applied to the plywood with a clean paintbrush in even and leveled brush strokes to coat the surface. Coating the surface unevenly saturates it, making it harsh. Even coating is critical to achieving a proper and smooth finish. Allow the sanding sealer to dry as directed by the manufacturer. Seal both sides of the plywood in stages if you want to do so. Finish one side first and let it dry. After that, seal the other side.
- The sealed surface is now sanded with 120-grit sandpaper once again. This gentle sanding smooths out the irregularities from the previous sanding and reduces airspaces (left over from sealing). Sand until the surface is smooth, but not to the point of destroying the seal. This gives the plywood a waxy appearance.
- A final coat of sanding sealer is applied and let to dry in this step. This provides a long-lasting finish to plywood.
There are three common methods for sealing outdoor plywood.
Tips for Protecting Plywood
Weatherizing plywood is required to ensure that it lasts a long time outside. You may easily do it on your own using the methods listed below. This project will only take 1-2 days to complete.
1. Polyurethane
Applying exterior polyurethane varnish is one of the greatest ways to seal plywood edges outside. The resources listed below are required.
Small sized brush
Varnish
Tape for masking
Using a brush, apply a coat of polyurethane varnish to the edge of a piece of wood. It should not be used on the plywood’s surface. Masking tape should be used to cover the entire surface. Tape across the entire surface to block the varnish.
If varnish adheres to the plywood surface, it prevents the wood from absorbing any future treatments. Wait 30 minutes after the first coat. Apply multiple layers of varnish after that for the best results.
Water will not be able to penetrate the plywood edges thanks to this treatment. It also aids in protecting it from adverse weather conditions.
2. Water Based Stain
Apply a coat of any external water-based stain to the plywood’s whole surface. These stains are fairly light in color and don’t have a lot of contrast. These are the best for shielding the surface from severe UV rays. Take advantage of the following resources.
Cloth rag for pump-up sprayer
Pigment stain with a water base
Apply the stain with the help of a garden or pump-up sprayer. Allow a few minutes for it to dry. The stain container will always state the drying time. Follow the steps in the order listed for the best results.
After spraying the entire surface, wipe away any surplus or leaking stain with a cloth. Keep in mind that this water-based pigment stain isn’t intended to cover the entire surface of your plywood. They will give your wood a light hue and prevent it from sun damage.
Leave your wood for at least 24 hours after applying the stain coat for the best results.
3. Water Seal
This sealant is excellent for preventing water penetration into plywood. It’s a good wood conditioner that doesn’t clog all of the wood’s pores.
The following are the items you will require.
Water Seal
Sprayer such as a garden sprayer
Take a garden sprayer with a pump. Apply a water seal finish to your plywood. Apply another coat after leveling the surface. To get the best protection against water penetration, use numerous applications of sealant. It is recommended that you reapply sealant every two years.
Water sealants come in a broad variety of colors and can be obtained in any paint store. They are usually labeled with the manufacturer’s name.
Which Plywood Should You Use Outside?
There are many different types of exterior plywood, and it’s vital to know which one would work best for you. Sealing will be useless if it is not chosen correctly. It will be prone to decay, softening, and breaking. CDX, marine-grade, pressure-treated, OSB, and T-11 are the most prevalent varieties of external plywood.
Decking, porches, planters, and arbors are all made using marine-grade exterior plywood, which features knot-free sheets. The most often used plywood is CDX. It usually comes in piles of three, five, seven, and nine, with the lowest number indicating the CDX plywood’s topmost class. They’re commonly employed in the construction industry and for building roofing.
The oily surface of pressure-treated outdoor plywood can be identified. It’s made by injecting normal plywood with various chemicals under a high pressure. Because of the chemical treatment, this wood is resistant to decay and mildew.
OSB plywood is mostly used for roof decking. It is made with a water-resistant adhesive and protects against excessive wetness. Sidings are the most common application for T1-11.
The best part about this plywood is that it can be painted in a natural hue and is well-matched to a variety of colors.
If you’re on a tight budget, CDX plywood is a good option. A CDX with a urethane coating offers excellent weather resistance.
Pressure-treated plywood is an excellent alternative for horizontal installations. Even in poor drainage systems, this wood lasts longer.
If you’re working on a project with exterior vessels for water movement, marine-grade plywood is the way to go. This sort of wood is pricey, but it has a high resistance to moisture. It’s ideal for underwater applications, such as boats.
Choose a T1-11 if you’re working on a siding project. This type of wood is also suitable for large wooden boxes on the exterior. It can be stained to whatever color and appearance you like.
Always choose appropriate plywood for your external project and seal it in stages. Professional woodworkers employ the techniques listed above to increase the life of external plywood.
The procedures and tips stated above are also useful for safeguarding the wood’s edges. Because the edges of the wood are more exposed to weather, sealing them is quite crucial. It will improve your wood resistant capability if you seal plywood flawlessly.
Part 2 – Advanced Plywood Sealing
Although plywood is an excellent building material, not all sheets are created equal. You’ll need to discover how to waterproof plywood if you have normal plywood sheets that have been exposed to water. This will save you money in the long run by preventing costly water damage and repairs.
Plywood waterproofing is a simple method that can save you hundreds of dollars in water damage repair charges. Waterproof plywood can be done with a variety of materials, including waterproof paint, oil, and varnish. This significantly extends the life of plywood, reducing rot, warping, and splitting.
In this post, you’ll learn about plywood’s water sensitivity, how to waterproof plywood, and the various varieties of plywood available.
What Is the Best Way to Waterproof Plywood?
Is Plywood a Waterproof Material?
Water-resistant, not waterproof, is the best way to describe plywood. Even then, the title “water-resistant” might be a stretch! Small amounts of water will not harm it, but continuous moisture exposure can be fatal. Plywood is made up of thin wood veneers that have been laminated and cemented together with heat and pressure. Although it is a tough substance, moisture can penetrate through the layers, causing them to separate or split.
When plywood is created, the wood is treated with water, which absorbs into the wood and causes it to expand. The water is then squeezed out as the layers are forced together and heated, causing the wood layers to bond even tighter. As a result, water and plywood don’t mix well.
Water makes plywood vulnerable because it causes the individual wood layers to expand again. Because the adhesive that binds the layers together can’t endure the sluggish expansion, the layers will separate over time, ripping apart. Depending on how much water the plywood is exposed to, this can take many years or only a few months.
When plywood is exposed to moisture, it behaves differently than solid wood. When a wooden beam is wet, it will absorb water and eventually decay, but it will not easily lose its structural integrity. The consequences of water damage on plywood are substantially larger since water separates the layers.
Additional than splitting, there are two other things that might happen when plywood gets wet: rot and warping. When moisture corrodes the wood to the point where it can no longer support weight, rot happens.
This can happen with plywood where screws/nails are used, and the sheets can fall totally loose since the wood no longer grips the nail tightly. Warping causes warped, curled plywood, which looks terrible and is unusable in any construction project.
Is it Possible to Waterproof Plywood?
Waterproofing material adheres well to plywood. On a micro level, the smooth finish is nevertheless porous enough that sealers and paints will attach easily to the plywood. As a result, plywood can still be utilized in outdoor and marine settings. You may use waterproof plywood on your outside deck, boat dock, or even on the boat itself!
Waterproofing your plywood is critical since it prevents you from having to replace it fully every year or two. Because plywood is typically utilized in whole sheets rather than narrow boards, a single damaged sheet of plywood has a significant impact on a vast surface area. If your floors and walls are built of plywood, you may have to replace a big portion of your home!
The Advantages of Sealing Plywood
So, how can waterproofing assist you? Here are some of the advantages of applying a waterproofing coating to your plywood:
Life Expectancy
Outside, untreated wood planks like 2X4s endure roughly two years. Plywood will likely disintegrate considerably faster if left exposed to the weather because it is less moisture-resistant. The same is true indoors: untreated plywood is just as vulnerable to water leaks as it is to rain and snow. However, properly maintained plywood can last anywhere from 20 to 40 years!
Defends against rot
Even if the plywood does not totally split, extended exposure to water can induce decay, just as it would with regular timber boards. Wood rot not only looks horrible, but it also smells bad and degrades the wood. For your deck, home, or boat, wood rot can spell tragedy. Waterproofing your plywood will save you the trouble of dealing with a panel that is slowly collapsing!
Dry Rot Prevention
Isn’t natural decaying the same as dry rot? While the symptoms of dry and wet rot are similar, they are caused by distinct things. Dry rot happens when minute fungus develop on the wood’s surface and is nearly impossible to detect until it’s too late. It doesn’t need a lot of moisture because the damage happens after the wood has dried out and the fungi have already started to develop!
Moisture and UV Ray Protection
Exposure to moisture and heat on a regular basis will quickly warp plywood. A completely flat plywood sheet transforms into a modern art sculpture after a rainy summer. Those bends and curves are attractive, but they don’t make for a good deck, floor, or siding. Waterproofing plywood sheets is an excellent approach to ensure that they survive decades rather than months.
Splitting Reduction
One of the most harmful effects of water exposure in plywood is splitting. It causes the wooden layers to split, destroying the sheet totally. The worst aspect about splitting is that it can be difficult to spot; by the time you find it, the water has likely already caused damage to other portions of the deck/house/boat. To avoid cracking, wet the plywood before mounting it.
How to Protect Plywood from the Environment
What is the best way to seal plywood for outdoor use?
There are a few typical methods for waterproofing outdoor plywood. The good news is that the majority of them are both inexpensive and straightforward to use. They’re also more or less equally effective when used correctly. Because each method does a good job, it might be difficult to determine the absolute best way to seal plywood.
Let’s have a look at the top 6 waterproofing plywood methods:
Epoxy Sealer
The most common method of protecting plywood from the weather is to use an epoxy sealant. Epoxy is commonly found in the form of paint or spray. Epoxy has the advantage of making the plywood stronger while also making it waterproof. The epoxy hardens into a robust, durable exterior layer that resists scratches, dents, and water!
The epoxy soaks into the plywood’s surface and dries clear, allowing the wood/plywood to keep its natural color. Plus, if you sand the hardened epoxy down using sandpaper, you can still paint over it with any color you want!
Drying Oil
Because it allows the plywood to retain some of its natural moisture and flexibility, drying oil is ideal for outdoor and maritime applications. Unlike epoxy, which creates a shell around the plywood, drying oil soaks in and gives a thin but effective covering.
If you want to use plywood in a high-moisture setting, such as a dock or boat, or if you reside in a wetter climate, drying oil will be the best waterproofing option. It differs from epoxy, paint, and other sealants in that it hardens the wood against water damage rather than fully keeping water from entering the wood.
This means that the wood will last much longer without being completely “waterproof” in the traditional sense.
Water Based Paint
Paint-based waterproofing isn’t as long-lasting as epoxy or drying oil, but it’s still effective. Water-based paints can be used outside, but they will need to be repainted or touched up every few years. Water-based paint won’t fracture or peel as easily as oil-based paint, but little flaws like these will show up over time.
These issues are simple to resolve, and waterproof paint will protect your plywood from moisture damage. Plus, most other techniques of plywood sealing don’t offer the same benefit that paint does: color! The “hassle” of touching up waterproof paint every few years is more than worth it to get the precise color you want.
Varnish
Varnish is a phrase used to describe any thinly applied mixture or resin that cures to provide a hard coating.
It’s not as thick or obvious as epoxy or paint, but it shares many of the same characteristics. When most varnishes are dry, they have a nice glossy finish. You may have heard of marine varnish used to seal wooden garage doors.
The varnish is perfect for above-water line maritime applications, such as the upper parts of wooden boats or the above-water portions of your dock. It will resist salt, mildew, and moisture for many years as long as it is not submerged. For that reason, it’s also perfect for outdoor (non-marine) use!
Liquid Latex
Liquid latex, available in spray or brush-on forms, may be the simplest way to waterproof plywood: just spray it on and forget about it! The only disadvantage of using liquid latex is that it can be difficult to detect if you have enough on the plywood to adequately seal it.
Furthermore, it is not cost-effective on a wide scale. However, you might be willing to spend a higher price (in comparison to brushed paint) for the convenience of spraying liquid latex liberally.
Liquid latex is a method that works almost anywhere if used properly, such as getting adequate covering. It adheres effectively to plywood and will provide worry-free service for several decades.
Water will be able to enter into the plywood through the gaps created by poorly sprayed latex if you don’t achieve enough coverage, and all your hard work will be for naught! So, if you’re going to use liquid latex, make sure to completely cover the plywood with it!
PVA
This is a sort of adhesive that has been used in the past for bookbinding. PVA offers all of the characteristics you’d want in a waterproofing material: it dries thin and clear, adheres nicely on plywood, and is entirely waterproof.
It’s a good idea to dilute PVA with water before using it to seal plywood so that it goes on thinner and soaks into the board a little before drying.
What Is the Best Way to Waterproof Plywood?
Now that we’ve gone through the various waterproofing options for plywood, it’s time to get to work sealing it.
Step 1: Get the Plywood Ready
The plywood must be prepared before applying liquid latex, paint, or PVA. Remove any unclean areas from the surface of the plywood sheet using a brush or a dry cloth.
Then, using wood filler, smooth up any rough patches on the sheet’s surface. This will give it a uniform smoothness and prevent any waterproofing gaps. Allow time for the wood filler to dry and firm before moving on to the next stage.
Wipe down the sheet with a moist cloth once the wood filler has dried. The small amount of moisture helps the sealer bind to the plywood sheet by raising the grain of the wood.
Lightly sand the plywood with medium-grit sandpaper as the final stage in preparation (60-100 grit). This will smooth the sheet and remove any rough places that may cause the painting/sealing to “gunk up.”
Step 2: Use a sealer.
If you’re going to use a brushed-on sealing approach, apply it with a brush or roller as usual. Make sure you obtain a good coverage with the first layer and wait for it to dry before applying the second. Some materials and waterproofing requirements may necessitate a third coat. While this isn’t strictly necessary, it can’t hurt!
Read the manufacturer’s directions carefully if you’re utilizing a spray approach. When spray-on sealer is used incorrectly, one of two things happens not using enough sealer to adequately cover the surface, and having inconsistent concentration, with a lot of sealer in some places and none in others
These dangers exist because spray-on sealers are more difficult to see and manage than brushed-on sealers. So, when you’re spraying the sealer, think about where you’re aiming the can!
Step 3: Allow it to dry and keep an eye on it.
Allow at least a couple hours for the plywood to dry, and up to 24 hours if you have the time. Then, once it’s entirely dry, you may put it in place! Apply a little sealant over the screws/nails after the plywood is attached to keep it watertight!
Finally, even if your plywood sheets are now waterproof, you should inspect them every few months to ensure that water isn’t causing havoc behind your back. Water damage will be obvious, so this shouldn’t feel like a thorough inspection—just a “eyeball test” to make sure everything is in working order!
What Is the Best Way to Seal Plywood Edges?
We’ve covered how to protect a plywood sheet’s surface, but what about the edges? Is it necessary to waterproof them, and if so, how should the plywood edges be sealed? The margins of plywood are particularly vulnerable to water since it is made up of numerous layers.
When water comes into contact with the edges of plywood, it can split much more quickly than it would on the sheet’s surface. As a result, waterproofing the edges is critical—perhaps even more so than waterproofing the surfaces!
Apply numerous coats of varnish to the plywood edges, allowing each coat to cure for roughly an hour between coats. Because the edges will quickly absorb the varnish, you’ll need extra coats to ensure that it cures to produce that protective coating.
Which Plywood Should You Use Outside?
It would be a mistake to think that all plywood is equivalent in terms of water resistance. The truth is that plywood is a broad category of wood products, and each type is better suited to a certain application. Some plywood is waterproofed before it is purchased, so you won’t have to bother about sealing it yourself!
CDX Plywood and ABX or “marine-grade” plywood are the finest choices for outdoor application. CDX is a rough, lower-quality wood that has been carefully treated for water resistance, making it perfect for roof sheathing.
The best waterproofing of any plywood is marine-grade plywood, which is more smoother and higher quality. Marine-grade plywood is used to build decks, boardwalks, and other shoreline structures, as the name suggests.
Waterproof Plywood Types
Plywood is classified on an A-D scale, with A being the best and D being the worst. The first letter depicts the front face, while the second letter, which is usually more coarse, indicates the back face.
The third letter is less significant, but it denotes the sort of glue used to join the layers together. The appearance of the wood is represented by these letters, not its strength. So, while ABX has a prettier appearance than CDX, the two have equivalent strength and water resistance. Let’s have a look at the many types of waterproof plywood and their suggested applications!
Plywood ABX
ABX is a smooth, robust plywood that is also known as marine-grade plywood. It’s designed for nautical use, but it also works well as exterior plywood. It’s been specifically treated to resist salt, mildew, and water, and it has the smoothest, most pleasing surface of any plywood, earning it the “AB” grade.
ACX Plywood is a manufacturer of high-quality plywood.
ACX is a waterproof plywood that shares many characteristics with marine-grade plywood but lacks the marine-specific treatment. It’s waterproof and durable, making it ideal for decks, outdoor walls, and renovations.
Plywood ADX
This type of plywood is similar to ACX, except the rear face of the sheet is rougher and knottier. Because only the front face has the more expensive “A” graded veneer, it may be a less expensive option. It’s ideal for usage as a subfloor in a home or in exterior building.
BWP Plywood is a type of plywood that comes in a variety of
The letters on this plywood spell out “Boiling Water Proof,” which means exactly what it says. This plywood is exceptionally tough and will maintain its integrity even when submerged in boiling water! It’s suitable for usage in a kitchen or bathroom where hot water and steam will be present all of the time.
Plywood of the MR Grade
The “MR” stands for “moisture resistant,” thus this plywood is suitable for indoor use. It isn’t totally waterproof; it can withstand dampness and water droplets but not standing water. MR plywood is great for interiors in humid locations since it does not deform due to humidity.
Plywood of BWR Grade
“Boiling Water Resistant” plywood is like BWR plywood’s slightly weaker cousin. Although it is not technically watertight, it will withstand steam and boiling water. Cabinets, sinks, and other areas where water and steam may be present but not all of the time are perfect places to use BWR grade plywood.
It’s critical to find a solution to seal and waterproof plywood if you want your house, deck, or shed to last. It’s a really straightforward technique, and anyone can make plywood entirely waterproof with a few basic steps and a little care! Furthermore, because certain varieties of plywood are waterproof or water-resistant, you may never need to waterproof it yourself if you chose your plywood carefully.

