How Does an Outdoor Kitchen Sink Work?
How to Work the Plumbing for an Outdoor Kitchen Sink
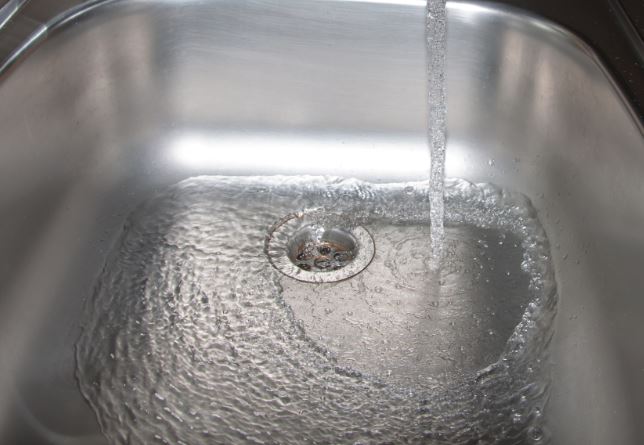
As with most plumbing devices, an outdoor kitchen sink needs a water supply and a drain.
An outdoor kitchen sink works by hooking up a supply of water to an outdoor sink faucet. Water then drains into either a waste system or receptacle.
Below, we’ll explore your options for water supply and drainage for outdoor kitchen plumbing when building an outdoor kitchen and which is appropriate for your entertaining needs, your location and your budget.
There are four sources of water supply that you can use for your outdoor kitchen sink:
1. indoor plumbing
2. garden hose
3. sprinkler system
4. self contained
Where to drain an outdoor kitchen sink:
1. the household sewer system
2. a french drain or dry well
3. a septic system
4. bucket or other receptacle
Ways to Hook Up a Working Water Supply
Using Your Indoor Plumbing to Supply Water to an Outdoor Sink
When you think of a kitchen sink, your indoor kitchen sink comes to mind. It is hooked up to your household water supply (whether city water or private well) and delivers hot and cold water through a faucet.
When plumbing for an outdoor sink, you won’t necessarily have the same water supply system accessibility that you find indoors. To enable your your outdoor kitchen sink to use the same water supply you need to access your existing indoor plumbing for your outdoor sink fixtures.
If your patio backs up to one of your bathrooms or your existing kitchen sink, then the process to tap into your indoor water supply is straightforward. You will need to open up the exterior walls of the house, tap into existing supply lines, and add feeder water lines to your outdoor faucet, one for hot water and another for cold.
This is one of those projects where local regulations may require you to get a permit for this type of plumbing work. If you are not super handy, you’ll probably need a plumber. And, if your location is such that the kitchen sink lines might freeze in the winter, you’ll need to install shut offs so the pipes don’t burst. Hiring a plumber will add to your costs but will give you peace of mind that your outdoor sink will function properly.
(Further down in this article, we will discuss tapping into the waste system in the house for outdoor sink drainage.)
Using a Garden Hose as a Water Source for an Outdoor Kitchen Sink
An outdoor spigot, or hose bib, might be just the ticket for a continuous water supply if your outdoor kitchen is not located near enough to an exterior house wall to tap into your indoor supply lines.
You can run a garden hose, or pex line, from the spigot into your outdoor sink cabinet to deliver water to an outdoor sink faucet. Both the hose and the faucet will require adaptive fittings to make secure connections but these are common and readily available. Some DIYers disguise the hose in plantings or conceal it inside other cabinets to mask where the water is actually coming from.
If you don’t use your sink for more than rinsing off dishes or occasional handwashing, this method works great and is one of the least expensive options.
Now, if you want hot water too, you have a few options. The first is to install an on-demand or tankless water heater in your outdoor kitchen sink cabinet. That will require a power source but you will have all the hot water you could ever need or want and right where you need it.
The second is to hook up a small water heater fueled by a propane tank similar to those that RVs use to heat water. Again, this is a point-of-use solution that fits the bill of hot water on demand from your outdoor kitchen faucet.
When using either of the above methods, you’ll want to make sure you have adequate space inside your sink cabinet to accommodate the tank and appliances. But you’ll have plenty of hot water to wash dishes and glassware. And, if you are so inclined, you can hook these appliances up to an outdoor dishwasher.
Using Your Outdoor Sprinkling System as a Water Source
If your outdoor kitchen is a ways away from the house, and if you have a sprinkling system for your landscape, your solution for a continuous water supply for your outdoor sink is close at hand. You can T-off the sprinkler lines with a fitting and a pex water line and feed it into your outdoor sink cabinet. There might be an issue with timers so you might have to make some zone adjustments to your system.
Another source of water you can use to tap into out of doors is a pool supply line. If one is convenient to your outdoor kitchen sink, it will work well to get you the water supply you need.
Self Contained Water System
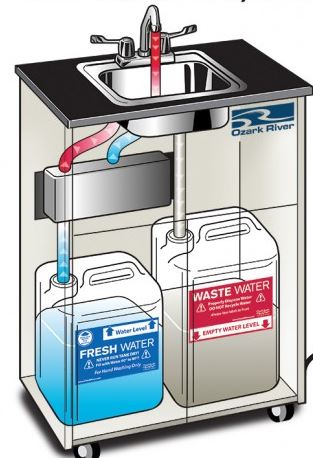 If you are using your outdoor sink primarily for hand washing and light duty, a portable hand wash sink might be the all-in-one solution you are looking for. This unit stands alone but does everything, supplies water, heats water, and drains all in one outdoor cabinet. They are used mainly in outdoor restaurants, food trucks, hospitality situations where the local health department requires sanitizing stations.
These units have been around for a while but fortunately, their design aesthetic has improved to where they would fit in nicely with most outdoor kitchen styles and prebuilt kitchen kits. These models have an integrated fresh water source tank and a waste water receptacle as well as an instant hot water heater. You need a 110v outlet with a 20amp circuit to operate the units which also have gfci outlet protection.
Ways to Drain an Outdoor Kitchen Sink
Household Drainage and Sewer System
Proximity to indoor plumbing is key when hooking up an outdoor kitchen sink to indoor pipes. As with any drain, you need the right slope and a vent stack so that water drains quickly and efficiently. The closer your outdoor sink is to an indoor waste pipe, the easier it is to make the wastewater connection.
Some communities might require a permit, as with supply lines, when dealing with or tapping into drain lines. Permits will require a licensed plumber to do the work adding to its cost. If you are looking for a close-to-inside-kitchen experience with your outdoor sink, hooking up to your home’s drain pipes will accomplish that goal.
French Drain or Dry Well
Without access to indoor plumbing, there are still a few options for outdoor sink drainage. If you will be draining only gray water (that is, no solids or food particles), a French drain or dry well will fit the bill for discharge from your outdoor sink.
Both options allow for gray water to seep into the ground through stones or membranes after drain discharge through a pipe. You can build either of these structures away from your entertaining areas to handle wastewater discharge and not disturb your landscape with visible pipes or structures.
Use an Existing Septic System to Accept Sink Wastewater
If your property is serviced by a septic system, it might be possible to install a drainage pipe from your outdoor sink drain directly into the pipes feeding the septic tank. Location of the tank and of your outdoor kitchen are considerations when deciding whether this is a viable option for your outdoor sink.
The advantage of tapping into a septic system is that you can discharge food solids into a septic system. If you will be using your outdoor sink to rinse off plates laden with food, or greasy pans and racks, then this option is tailor made for your situation.
Outdoor Sinks That Drain into a Bucket
The simplest solution if the outdoor sink is lightly used, or only used for hand washing is to have the sink drain right into a 5-7 gallon bucket. The bucket stays hidden inside the kitchen cabinet and emptied into the garden when full.
For an easy and inexpensive solution to how to drain an outdoor sink, this one tops them all.