Four Crucial Zones in an Outdoor Kitchen Layout
Outdoor Kitchen Layout Guide
When designing your outdoor kitchen, spend the bulk of your time figuring out the kitchen’s geography, or where to locate the major appliances and their associated storage. This is equally important in an outdoor cooking area if it is a full kitchen where food preparation is taking place. It is much less important, however, if you’ll only be cooking food that was prepped inside.
Just as you would in indoor kitchen designs, give each appliance, appliance cabinets, and task areas as much room as possible on both sides. This allows more than one cook to work at a time.
If the grill is set in one run of counters, a sink and refrigerator in another, and perhaps a wood fired pellet grill along a third leg, there’s always going to be plenty of room to prepare, cook, and plate food. But even if your outdoor kitchen is a one-grill station, you will still be well served by including a dedicated prepare and serve place, such as a worktable.
Even the simplest kitchen ideas require several important elements: a place to cook, a place to set food down going on or coming off the grill, and a place to eat and socialize.
Also useful are places to store fuel and weatherproof covers for the grill and table; outdoor dishes and glassware, if kept outside; and tablecloths, napkins, candles, bug spray, and chair pads. If you use candles, hurricane shades, kerosene lanterns, or other portable light fixtures, they need to be stored away when not in use.
Similarly, drawer cabinets are useful for storing utensils near where they are going to be used. Drawer grill cabinets are one such example where you can store a turner, grill brush and tongs.
If your proposed kitchen is more elaborate, with a sink, refrigerator, wood-fired oven and grill with side burners, you will have to plan even more carefully for utilities, as well as efficient and functional space allocation. An outdoor kitchen design tool might be helpful to reserve the proper amount of space.
Four Critical Zones in an Outdoor Kitchen
Divide your kitchen into four zones: hot, cold, wet and dry. The first three are each anchored by a major appliance and each needs to have storage for associated tools and supplies in the kitchen space.
-
- Hot Zone
The hot area (grill, smoker, wood-fired oven) needs space for fuel, barbecue and oven tools (pizza peels, tongs, iron push bars, etc.), pot holders and mitts, aprons, pans for the oven or for use on a side burner, wood chips for smoking, and so on. You’ll also need 3 to 4 feet of heat proof counter area in this zone, either on both sides of the grill or on an island that parallels the grill or wood oven, or both.
For built-in grills using bottled gas, your grill cabinet will need a cavity to store the gas cylinder. If you use a natural-gas hookup, you’ll need to route the gas line to the connection point. Be sure to order the appropriate connection for natural gas or LP grill, as the fixture for each is different. If your grill is electric, you’ll need an appropriate power connection, either 220v or 110v, depending on the grill. If you use charcoal or wood pellets, plan a storage area that keeps the damp out, such as a tightly covered can hidden in a base cabinet.
2. Cold Zone
The cold zone refers to the refrigerator and icemaker or wine fridge, plus space for moving food and beverages in and out of the fridge, even if it’s the counter area above a small undercounter cooler. If you make drinks, use a blender or juicer, or store and serve lots of soda or lemonade, give yourself as much space as possible to perform those tasks, and don’t forget to plan for electrical outlets.
3. Wet Zone
The wet zone is where the water is, mainly the sink area or the hose. Just like indoors, you’ll need waterproof and weatherproof counter space by the sink for dirty things on one side and clean on the other, even if you are only washing vegetables. Figure a minimum of 2 to 3 feet on each side, if possible, for maximum functionality, and leave some storage space for colanders, vegetable brushes, and other tools you’ll use in this area.
4. Dry Zone
The dry zone is the only area that lacks an appliance, but it is still important because food preparation, serving, and plating take place here. Even if your outdoor kitchen only consists of a grill, you need a dry zone to put down platters. It should be heatproof, easy to sanitize and impervious to weather. A zinc or stainless steel topped table with a shelf underneath is a simple and functional example; a built-in island covered in stucco and tile is more elaborate. A three foot long dry zone is recommended; a 5 foot or longer area is even better.
Outdoor Kitchen Design Layout Options
Your outdoor kitchen, like your inside kitchen, should be tailored to the manner you cook and the people you cook with. A single chef will require a compact and efficient room to travel between the grill and the prep area, whereas numerous cooks will require ample space to work without bumping elbows.
Plan room for each chef and appliance in an outdoor kitchen with a lot of equipment by giving each zone its own run of counter to create stations if there are a lot of people cooking at once. There are many different layouts to choose from; perhaps one of them would work best for you in your outdoor kitchen space.
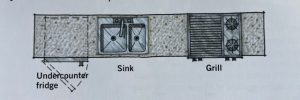
Straight run: Cabinets can be positioned side by side to make a free-standing island or against the back of the house to create a functional outdoor kitchen. If you’re utilizing all of your appliances, move ingredients from the refrigerator to the sink, then to the grill, and finally to the serving counter, in that order, from left to right.
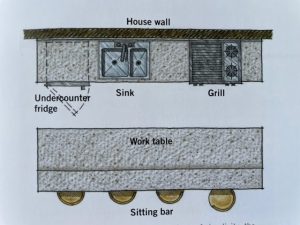
Two parallel lines (galley style): An island that runs parallel to one long series of counters is a highly functional plan both inside and out, especially if it is devoid of appliances. Make the kitchen island a designated food preparation and plating zone, with seating on the far side if desired, and bask in the openness of your outdoor space.
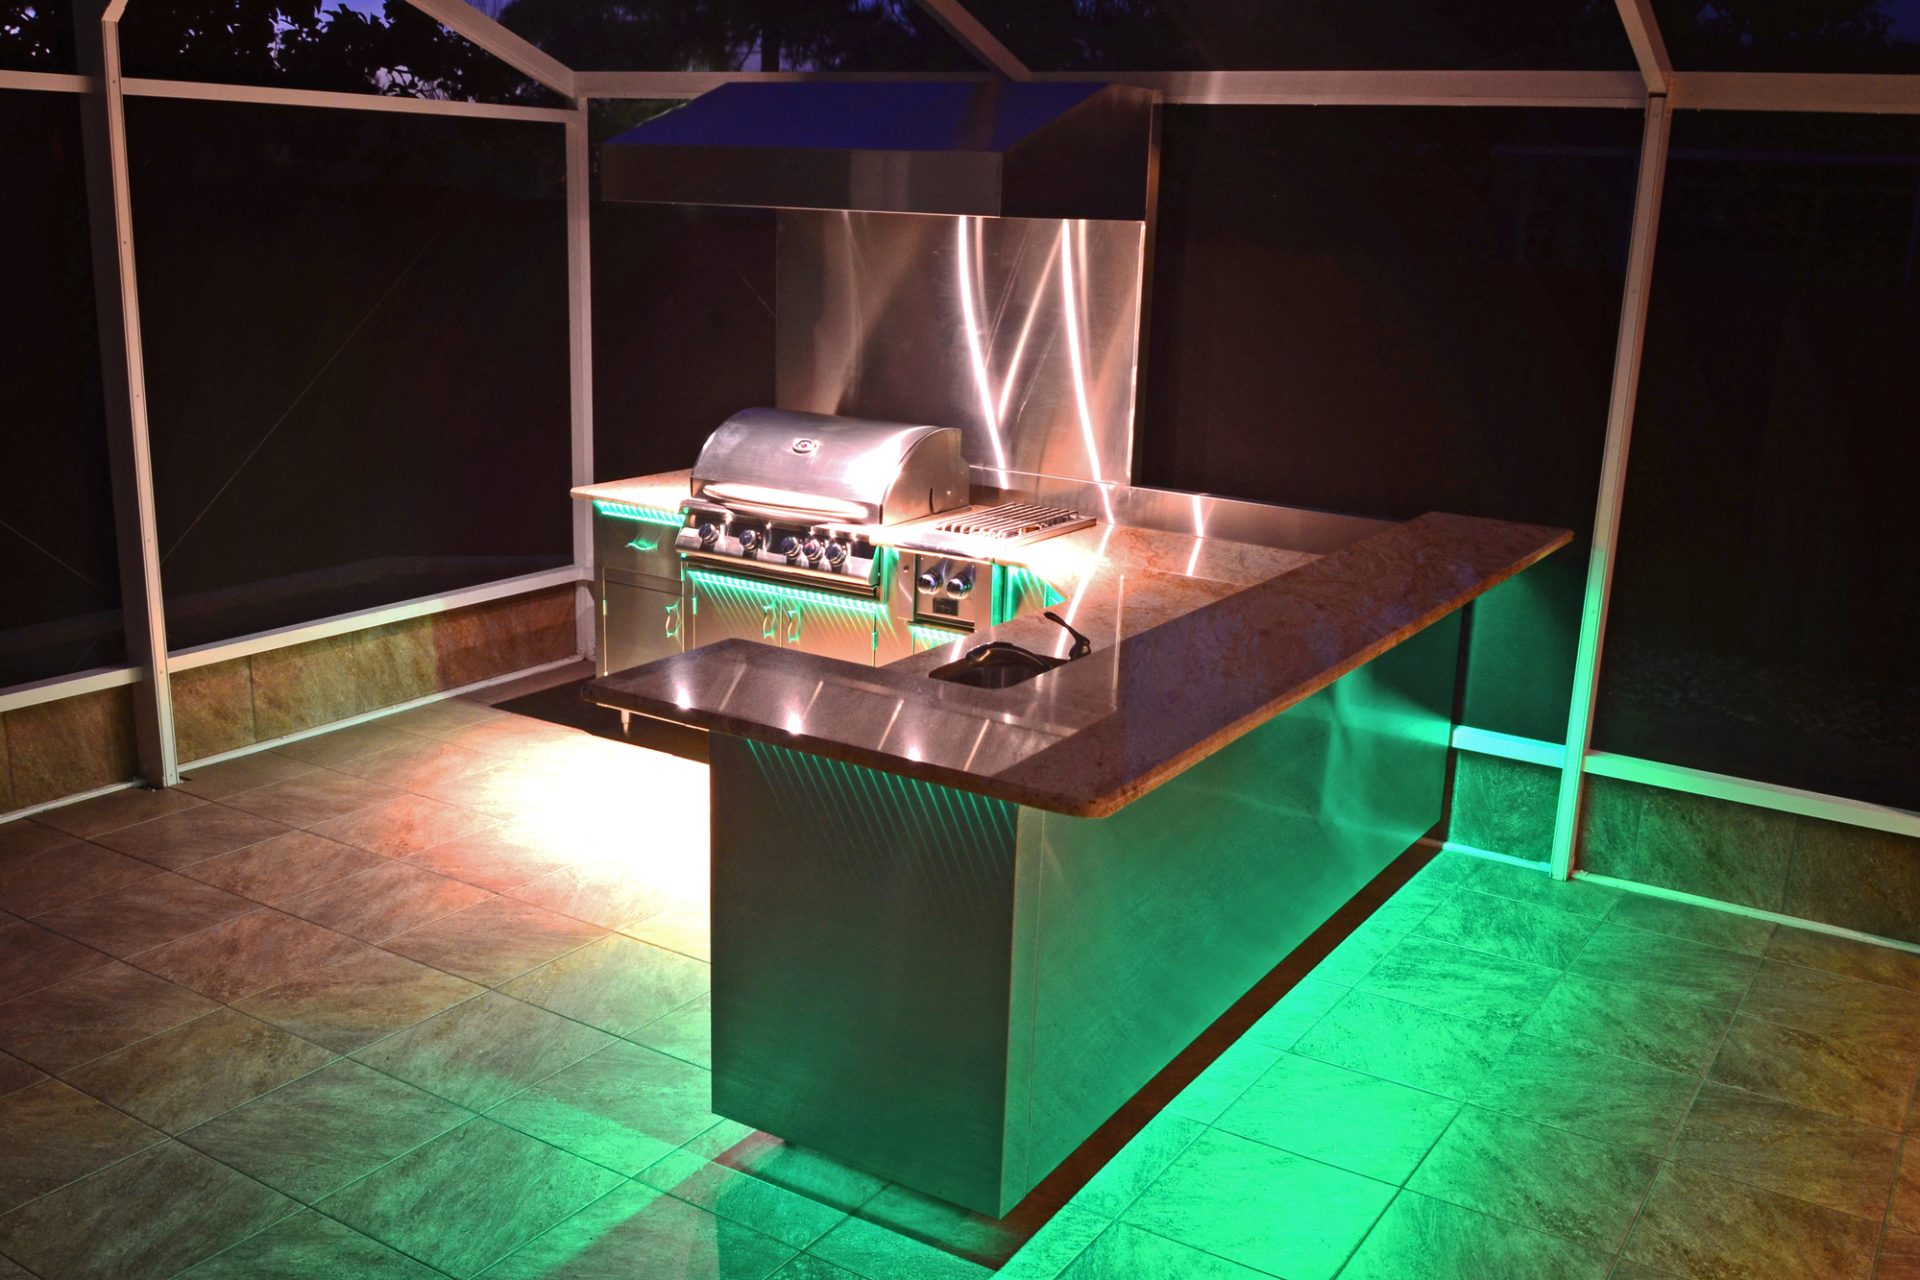
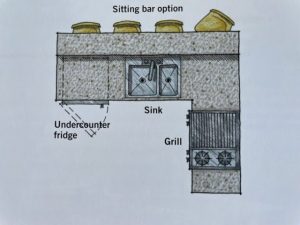
L-shaped kitchen: An L-shaped kitchen allows multiple people to cook at the same time because each chef can work on a different leg. Distribute the zones and appliances so that the grill is on a separate leg than the sink and refrigerator, and give each L enough counter space to be truly usable – at least 3 feet. For even more utility, you can add a bar island.
Because there are three different zones to work in, the U-shaped structure attracts guest cooks. You could place a sink on one leg, a refrigerator on another, and a grill on the third, or you could keep the fridge and sink together and dedicate a counter to food preparation and serving. With the addition of an island or central worktable, a U-shaped kitchen can be further customized, providing additional workspace.
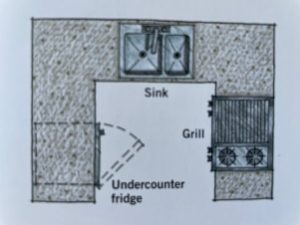
Unless it’s created on a huge scale, square outdoor kitchens use all four sides of a square and are usually one-person kitchens. That’s because it’s not easy to get out of the square once you’ve become imprisoned inside. A square, on the other hand, allows you to create separate and dedicated zones for each run of counter, as well as space for hot-zone additions like a wood-fired oven or pellet grill.
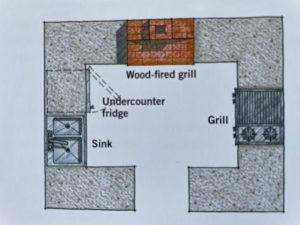
Knowing about the zones and different shapes of outdoor kitchen designs, will help you zero in on an outdoor kitchen plan. It will also help you site the location of individual specialty cabinets, grill islands, and other appliances such as pizza ovens before you purchase components for your kitchen.
There are quite a number of outdoor kitchen design software that can develop a custom outdoor kitchen plan for you. A design tool will help you narrow your options and maximize your allocated space. Or, start with the simple kitchen layout ideas we’ve profiled above and make your needed adjustments for your outdoor livings area.

