Outdoor Mini Fridge Cabinets
Hows and Whys of Outdoor Mini Fridge Cabinets
Having nearby access to chilled foods and beverages when entertaining outdoors is a convenience and a luxury. Leisure time is scarce and time spent running in and out of the house for another beverage is time that can be better spent with family and friends.
There are many ways to get outdoor refrigeration close to your patio, deck or pool. Some people might think of a large styrofoam cooler filled with ice and canned pop or beer. For many, this works well and is inexpensive.
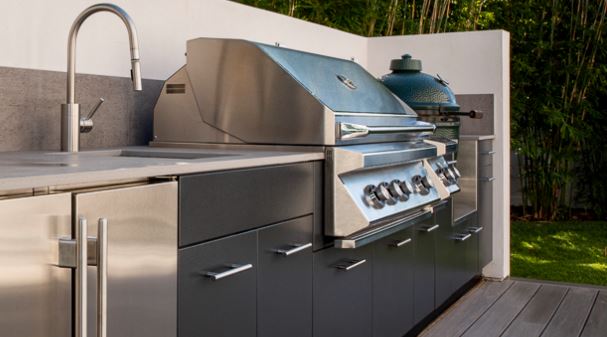
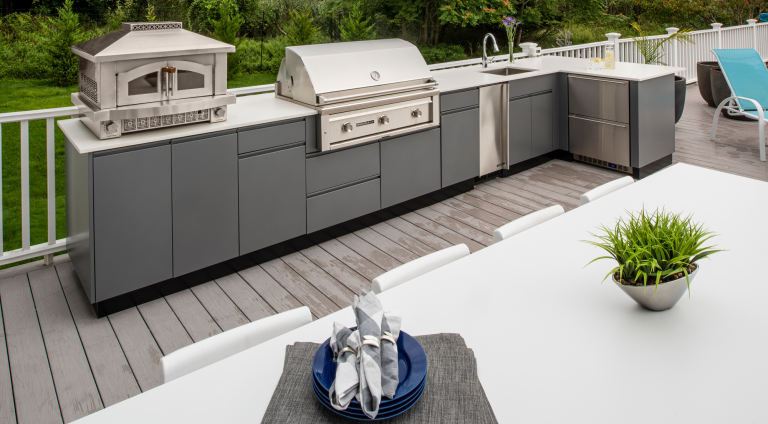
At the other end of the spectrum is a complete built in outdoor kitchen with a grill station, weatherproof outdoor cabinetry, built in appliances such as stainless steel outdoor refrigerators and wine coolers, and a fully functioning outdoor sink. These kitchens can get pricey, but are also growing as DIY projects which save on the expenses.
Somewhere in the middle you’ll find the majority of people that want an outdoor mini fridge to keep an adequate number of beer bottles and soda for the family and a place to keep the salad until dinner is served. They don’t need outdoor kitchen counter space for prepping food. They just need an attractive cabinet to protect outdoor fridges from the sun and the elements so it can work properly outdoors.
Enter the outdoor mini fridge cabinet. Not big. Not fancy. But oh so useful.
What is a mini fridge cabinet?
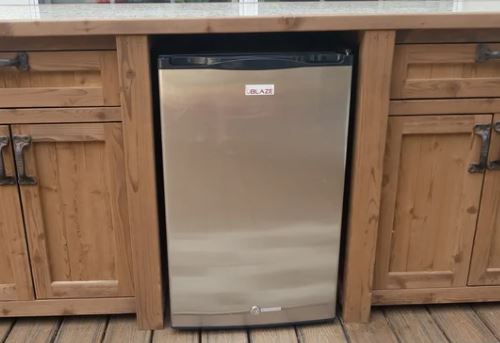
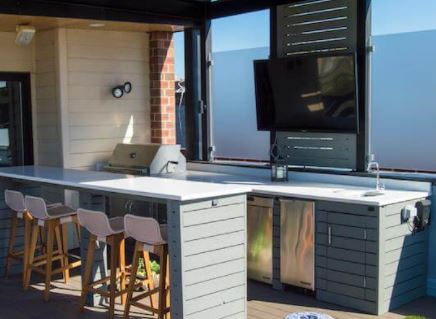
A mini fridge cabinet is a cabinet box that is closed on two sides and the top. The back may be open to allow for ventilation and external refrigerator coils. It may or may not have a cabinet door to hide the fridge inside the cabinet. It can be part of an outdoor kitchen island or a stand alone mini refrigerator storage cabinet.
A patio outdoor mini fridge cabinet usually has a shelf on the bottom to elevate the fridge off the ground so the fridge doesn’t come in contact with puddled water. Remember, water and electricity don’t mix so if you are putting your refrigerator outdoors, you want to make sure you are doing what you can to make it safe.
Types of Mini Fridges
This is a good time to discuss the type of mini fridge you have or are about to buy. There are indoor and outdoor rated mini fridges. There are also builtin or freestanding compact refrigerators.
We often get questions about using an indoor mini fridge, or dorm fridge, outside. We usually advise against it for the reasons we will be discussing below. But people will want to use a mini fridge outside to save money. These dorm-type fridges can be had for under $100 compared to fridges that are engineered for outdoor use which can cost anywhere from $500 to thousands of dollars.
Indoor mini fridges are usually made of painted metal or are plastic-coated to resemble stainless steel. Both of these surfaces are fine indoors where they don’t come in contact with rain, hail, salt spray and pollutants. Any of these outside contaminants can ruin the finish on an indoor refrigerator.
Refrigerators that are outdoor rated are not only made with aluminum or stainless steel, both of which are resistant to rust, but they are also more heavily insulated. When you consider that an indoor refrigerator only has to keep items cool in an environment that ranges from 68 F. to 75 F, its job is a pretty easy one and needs minimal insulation.
An outdoor refrigerator, on the other hand, is designed to operate efficiently in temperatures from 40 to 110 F. Not only does the motor and compressor need to be more robust, but all the parts need to be weatherproof and of premium outdoor quality. Further, the insulation in an outdoor refrigerator needs to be substantial, to save wear and tear on the mechanical equipment so it doesn’t work too hard and burn out.
It is important to remember that indoor refrigerators are not outdoor rated. The electrical components are not shielded against moisture invasion and electrocution hazards. Wires are not safeguarded against nibbling mice. Underwriters Laboratories have not certified them for safe use outside.
Another important difference is that the ventilation on the indoor refrigerator requires several inches of clearance on all sides of the refrigerator to operate safely and efficiently. Stand alone outdoor refrigerators have the same issue, while built in outdoor refrigerators require less clearance around the unit because the ventilation is located in the front toe kick.
If you are building an outdoor mini fridge cabinet, you will need to pay attention to and accommodate these clearances so the refrigerator works properly.
In sum, you can keep a mini fridge outside, but you have to balance convenience against safety, operating efficiency and weather related damage.
Buying a Cabinet for Your Outdoor Fridge
What factors should you think about while purchasing a mini refrigerator cabinet?
- Space. Even if you plan to purchase a mini refrigerator cabinet, it will still take up valuable deck or patio area. Calculate the measurements of the available space before going to your local outlets or internet stores. Allow for air circulation by leaving a couple of inches behind and above. Don’t forget to account for the space required for the door to swing open in your fridge dimensions.
- Capacity. You must also determine the optimal size for you in addition to calculating the area. A mini refrigerator cabinet is available in a variety of capacities measured in cubic feet. Figure out which one is best for you.
- Storage. You must first decide on the storage configuration for your mini refrigerator cabinet. Make a plan for how you want the drawers and shelves to be organized. You might prefer one with moveable glass shelves because they are more customizable and easier to clean. Pull-out bins or shelves that provide simple access to refrigerated items are also a good idea.
- Materials. Consider the materials you’d like to see in your mini refrigerator cabinet. Wood, high-density polyethylene, stainless steel, and powder-coated aluminum cabinets are all available to buy for outdoor use.
Building Your Own Outdoor Mini Fridge Cabinet
Because building a simple cabinet box is typically in the comfort zone of most DIYers, many outdoor mini refrigerator cabinets are made of wood. Using pressure treated framing lumber and weatherproofed plywood is common in DIY construction. These materials can be skinned with stone, tile, stucco or concrete to make the cabinet weather resistant.
How to Build a Cabinet for Your Mini Fridge
Materials List for a Mini Fridge Cabinet
1-1/4′′ pocket hole screws
Brad nails 1-1/4″
Edge Banding
3 drawer slide sets (18′′)
Cabinet knobs
two hinge sets
2 catches with magnets
Sandpaper (100, 150, 220 grits)
Wood glue
Finishing materials (primer & paint, or stain, sealer)
Lumber: 2 – 1×2 6′
3 3/4-inch plywood sheets
Cuts:
4 – 3/4′′ plywood – sides, 20′′ x 43-3/4′′
4 – 1×2 at 12′′ – Bottom Side Supports
2 – 1×2 x 12″x20′′ 3/4′′ plywood – Side Bottom
2 – 12′′ x 35′′ 3/4′′ plywood – Side Back
2 – 1×2 – Center Bottom Supports at 20′′
2 – 1×2 – Center Bottom Supports at 20′′
1 – Center Bottom – 3/4′′ plywood, 20′′ x 20′′
2 – Side Drawer Shelf, 3/4′′ plywood, 12′′ x 20′′ Shelves
1 – Center Drawer Shelf, 3/4′′ plywood, 20′′ x 20′′
Upper Side Back: 2 – 3/4′′ plywood, 5-3/4′′ x 12′′
Upper Center Back: 1 – 3/4′′ plywood, 5-3/4′′ x 20′′ Back
1 – 20′′ x 47′′ 3/4′′ plywood – Top
Shelves: 2 – 3/4′′ plywood, 12′′ x 18-1/4′′
Side Drawer Bottoms: 2 – 3/4′′ plywood, 9-1/2′′ x 16-1/2′′
1 – Center Drawer Bottom – 3/4′′ plywood, 16-1/2′′ x 17-1/2′′
Side & Center Drawer Sides: 6 – 3/4′′ plywood at 4′′ x 16-1/2′′
4 – 3/4′′ plywood, 4′′ x 11′′ – Front & Back of Side Drawer
2 – 3/4′′ plywood, 4′′ x 19′′ – Front & Back of Center Drawer
Side Drawer Fronts: 2 – 3/4′′ plywood, 5-1/2′′ x 11-1/4′′
1 – Center Drawer Front, 3/4′′ plywood, 5-1/2′′ x 19-3/4′′
2 – Doors, 3/4′′ plywood, 11-3/4′′ x 34-3/4′′
Plans for a Mini Fridge Cabinet
1. Before assembling the plywood, edge banding will be applied to the exposed edges
Cut the pieces for the side bottom supports and the side sides. Drill pocket holes in each end of the supports with the pocket hole jig set for 3/4′′ material. Glue and 1-1/4′′ pocket hole screws are used to secure the supports to the sides. The front supports will be 3/4 inch back from the sides’ front edge.
2.Make the side bottoms by cutting the pieces. Glue and 1-1/4′′ brad nails are used to secure the supports.
3. Drill pocket holes in all four edges of the parts for the side back pieces. Glue and 1-1/4′′ pocket hole screws are used to secure the rear pieces to the sides and bottom.
4. Drill pocket holes at each end of the pieces for the center bottom supports. Glue and 1-1/4′′ pocket hole screws are used to secure the shorter support to the middle of the longer supports. Glue and 1-1/4′′ pocket hole screws are used to secure the support assembly to each of the side cabinets. 3/4′′ back from the front border of the sides will be the front support.
5. Cut the piece that will go in the center of the bottom. Glue and 1-1/4′′ brad nails are used to secure the supports.
6. Drill pocket holes in each side edge of the parts for the drawer shelves. Glue and 1-1/4′′ pocket hole screws are used to secure the sides as illustrated. Pocket hole screws through the top of each back piece secure the side shelves.
7. Drill pocket holes in the side edges as well as the lower edge of the top back sections. Glue and 1-1/4′′ pocket hole screws are used to secure the sides and shelves.
8. Make the top piece by cutting it out. Glue and 1-1/4′′ brad nails are used to secure the sides and rear parts.
9. Drill pocket holes in the side and rear edges of the shelf parts after cutting them out. Glue and 1-1/4′′ pocket hole screws are used to secure the panels to the sides and rear of the cabinets.
10. Make the drawer boxes by cutting the parts. Drill pocket holes in the bottom four borders as well as the ends of the sides. Glue and 1-1/4″ pocket hole screws are used to assemble the drawer boxes as indicated. Install the drawer slides 34” back from the front edge of the sides, following the manufacturer’s installation instructions. Click here for a simple instruction. Make any necessary modifications.
11. Make the drawer fronts by cutting the parts. Drill the holes for the drawer pulls after marking the location. Drive screws through the holes for the drawer pulls into the drawer box, then shim the drawer front in the aperture – there will be a 1/8″ gap around all edges. Open the drawer and secure the drawer front from the inside with countersunk 1-1/4″ screws. Remove the screws from the drawer pull holes before continuing to drill them. Place the drawer pull in place. Click here for a simple tutorial on how to install drawer fronts.
12. To make the doors, cut the parts. After installing the hinges on the doors, place them in the openings. All four sides of the doors will have a 1/8′′ gap. Make any necessary modifications.
Install the cabinet pulls after finishing as desired.
There are many ways to configure outdoor refrigerator cabinets and this is just one of the options you can choose. Yours can be even simpler in design without drawers or side storage. Perhaps you just want to provide a fridge stand to keep the fridge off the patio. Or perhaps you want to build an outdoor minibar with more prep space on top for serving drinks. If you are handy enough to build a plywood box, then an outdoor mini refrigerator storage cabinet is well within your ability to create the perfect cabinet.

